Webhook
Schema
A webhook has the following fields:
#[derive(Clone, Debug, PartialEq, Eq, DeriveEntityModel)]
#[sea_orm(table_name = "sea_orm_webhook")]
pub struct Model {
    #[sea_orm(primary_key)]
    pub id: WebhookId, // uniquely identify the webhook
    pub platform: WebhookPlatform, // can be Slack / MsTeams
    pub url: String, // webhook URL
}
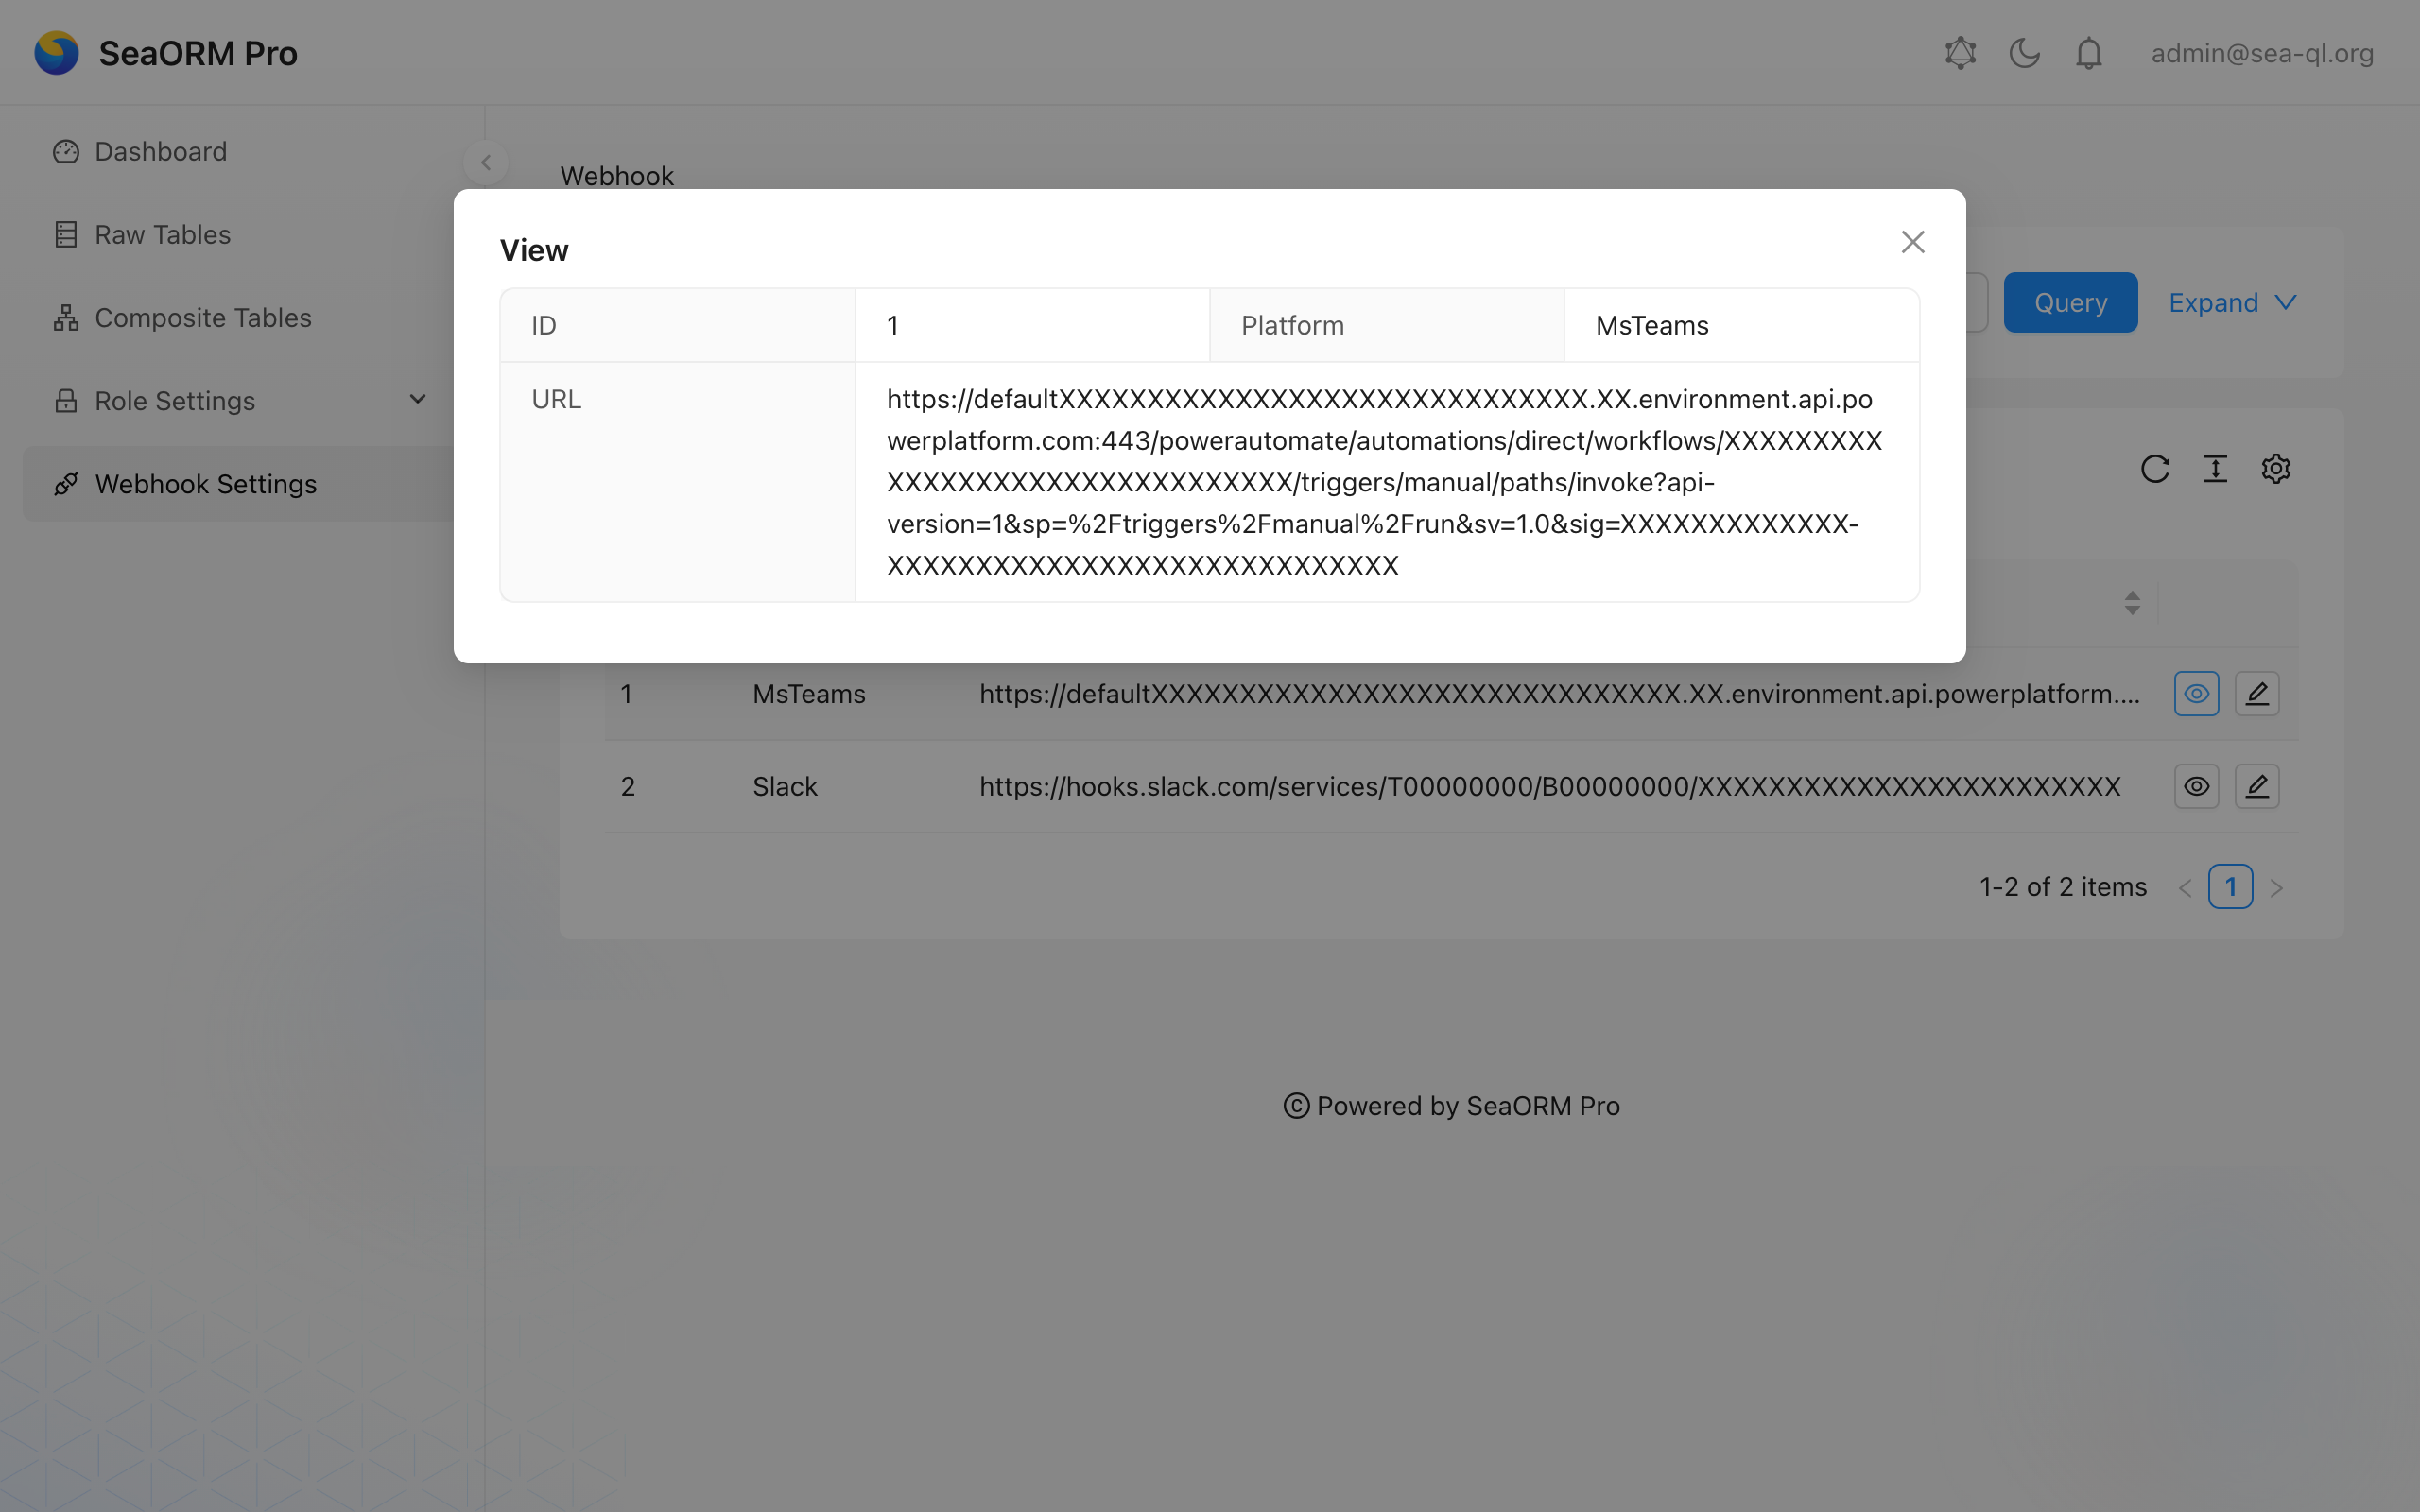
Config Webhook in Admin Panel
Login to the admin dashboard. If you have read & update permission of the sea_orm_webhook table, you should able to see the "Webhook Settings" page appear on the left:
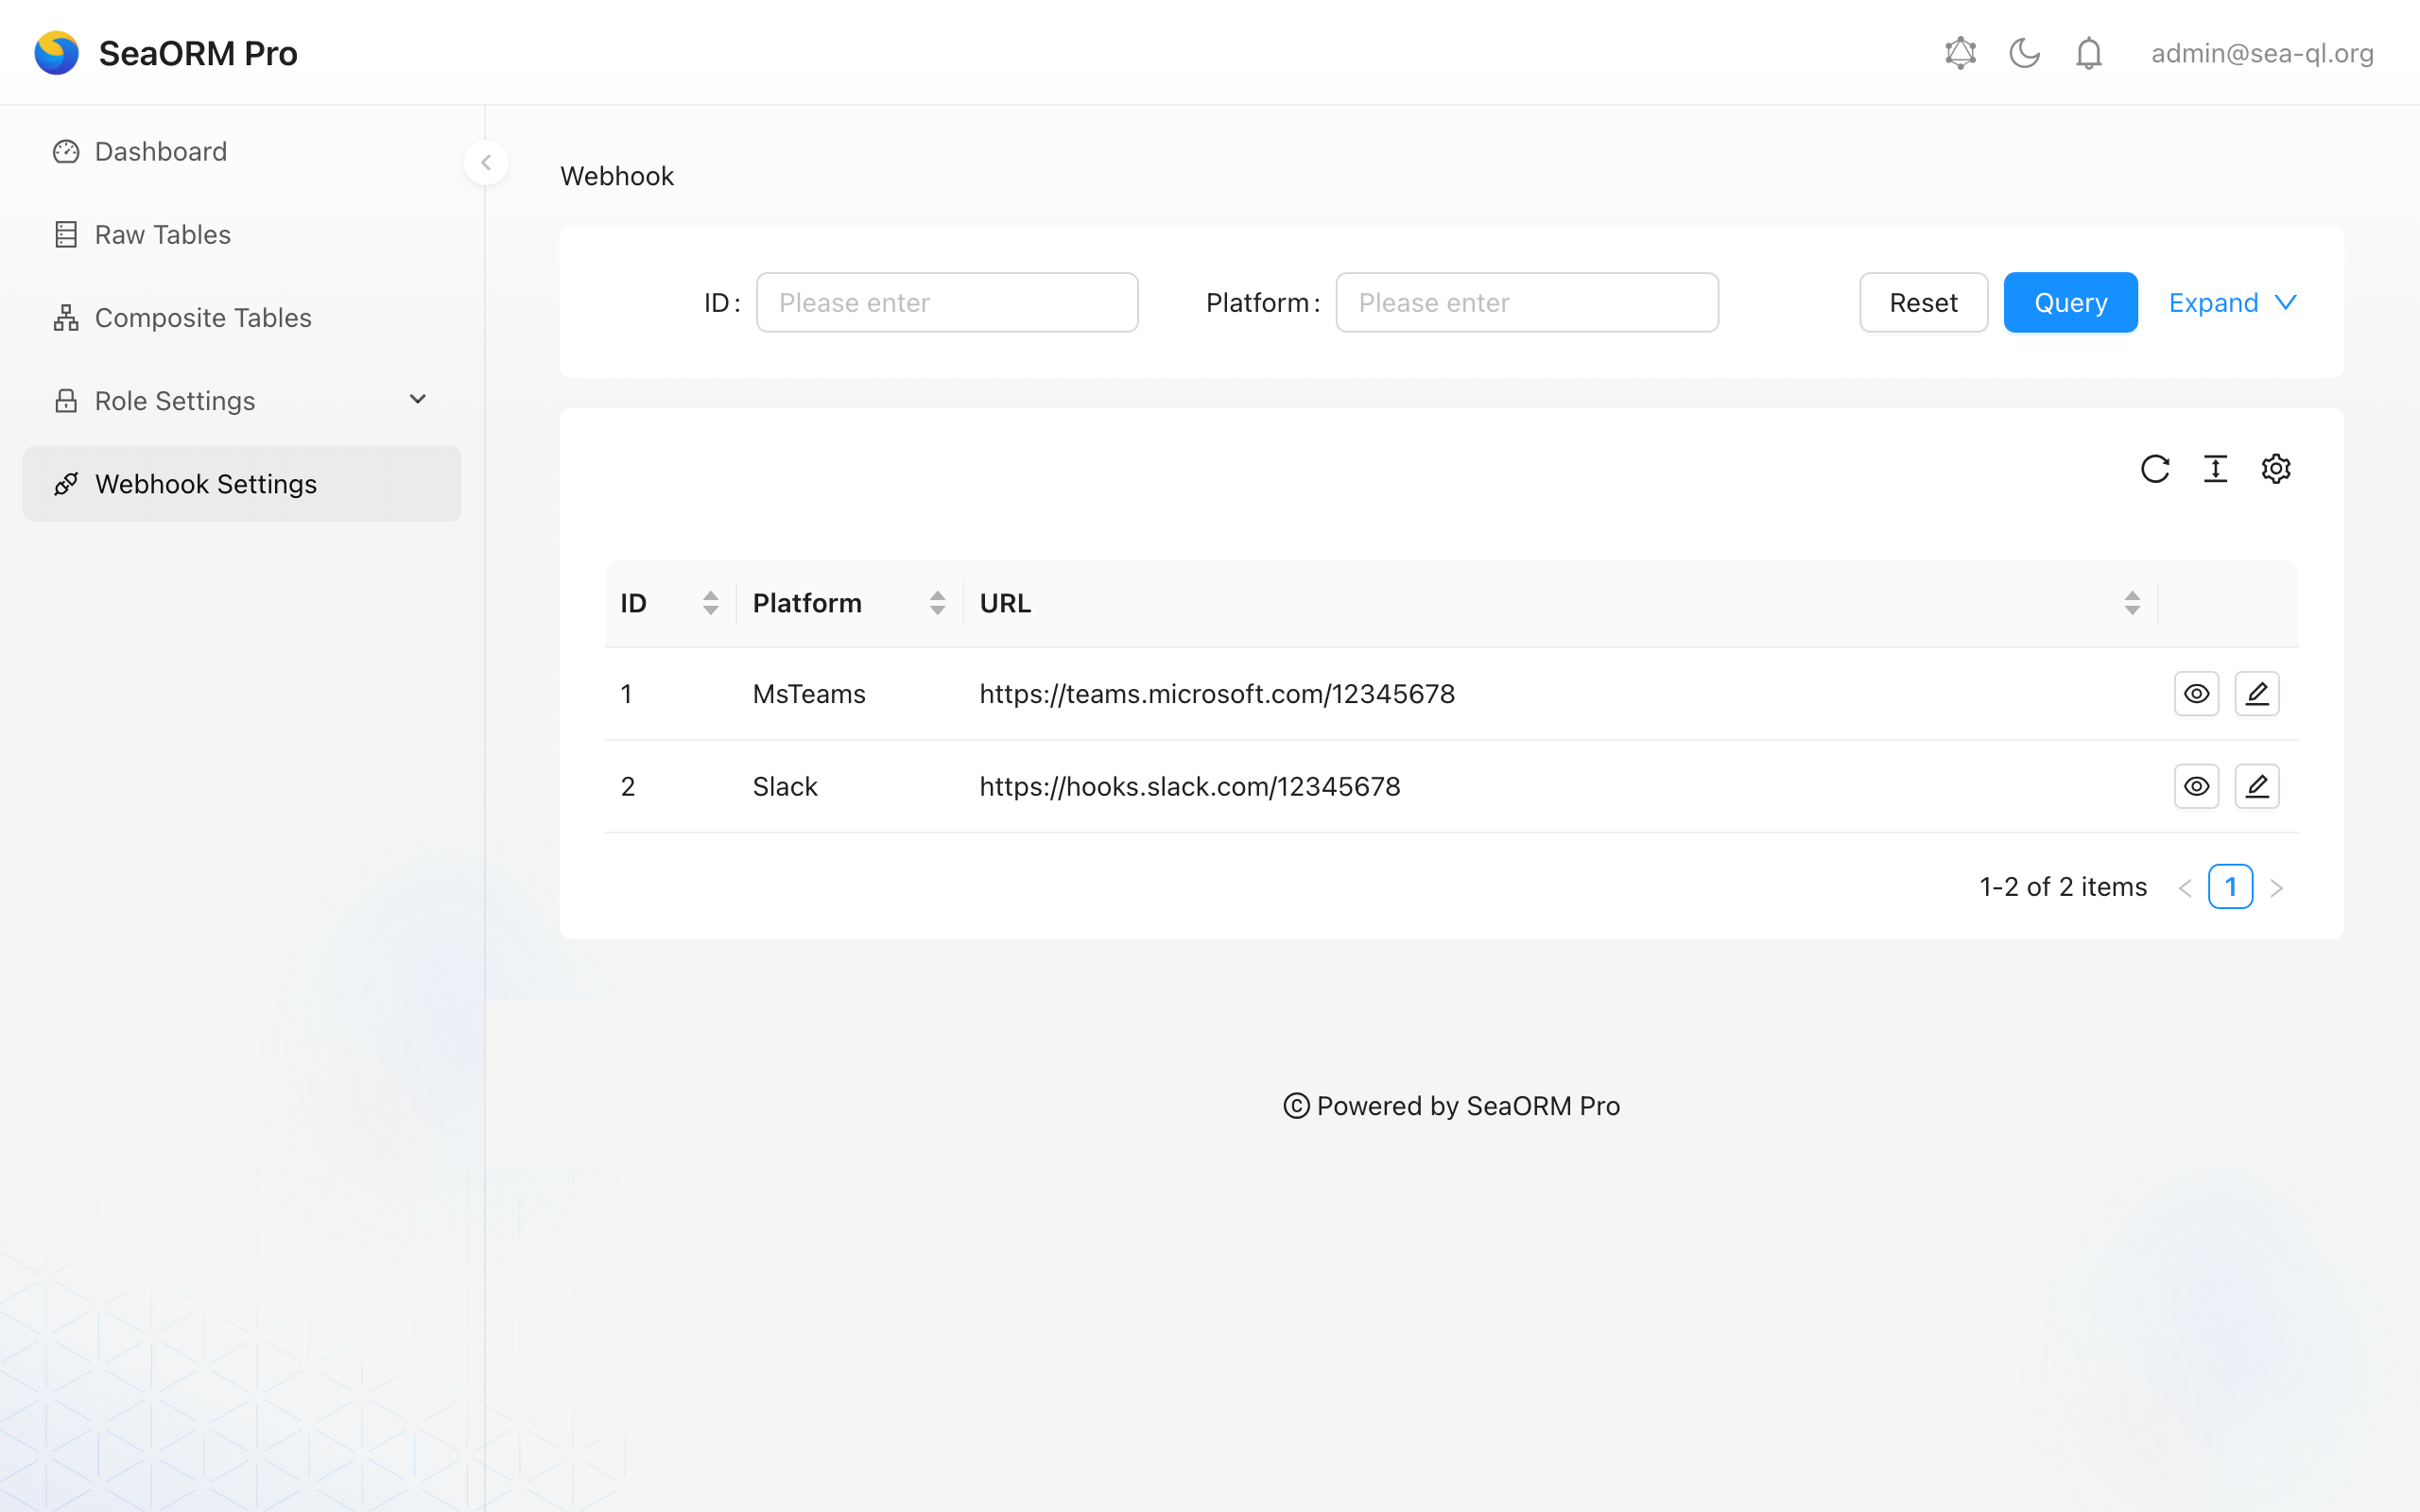
You can perform quick update of webhook URL here.
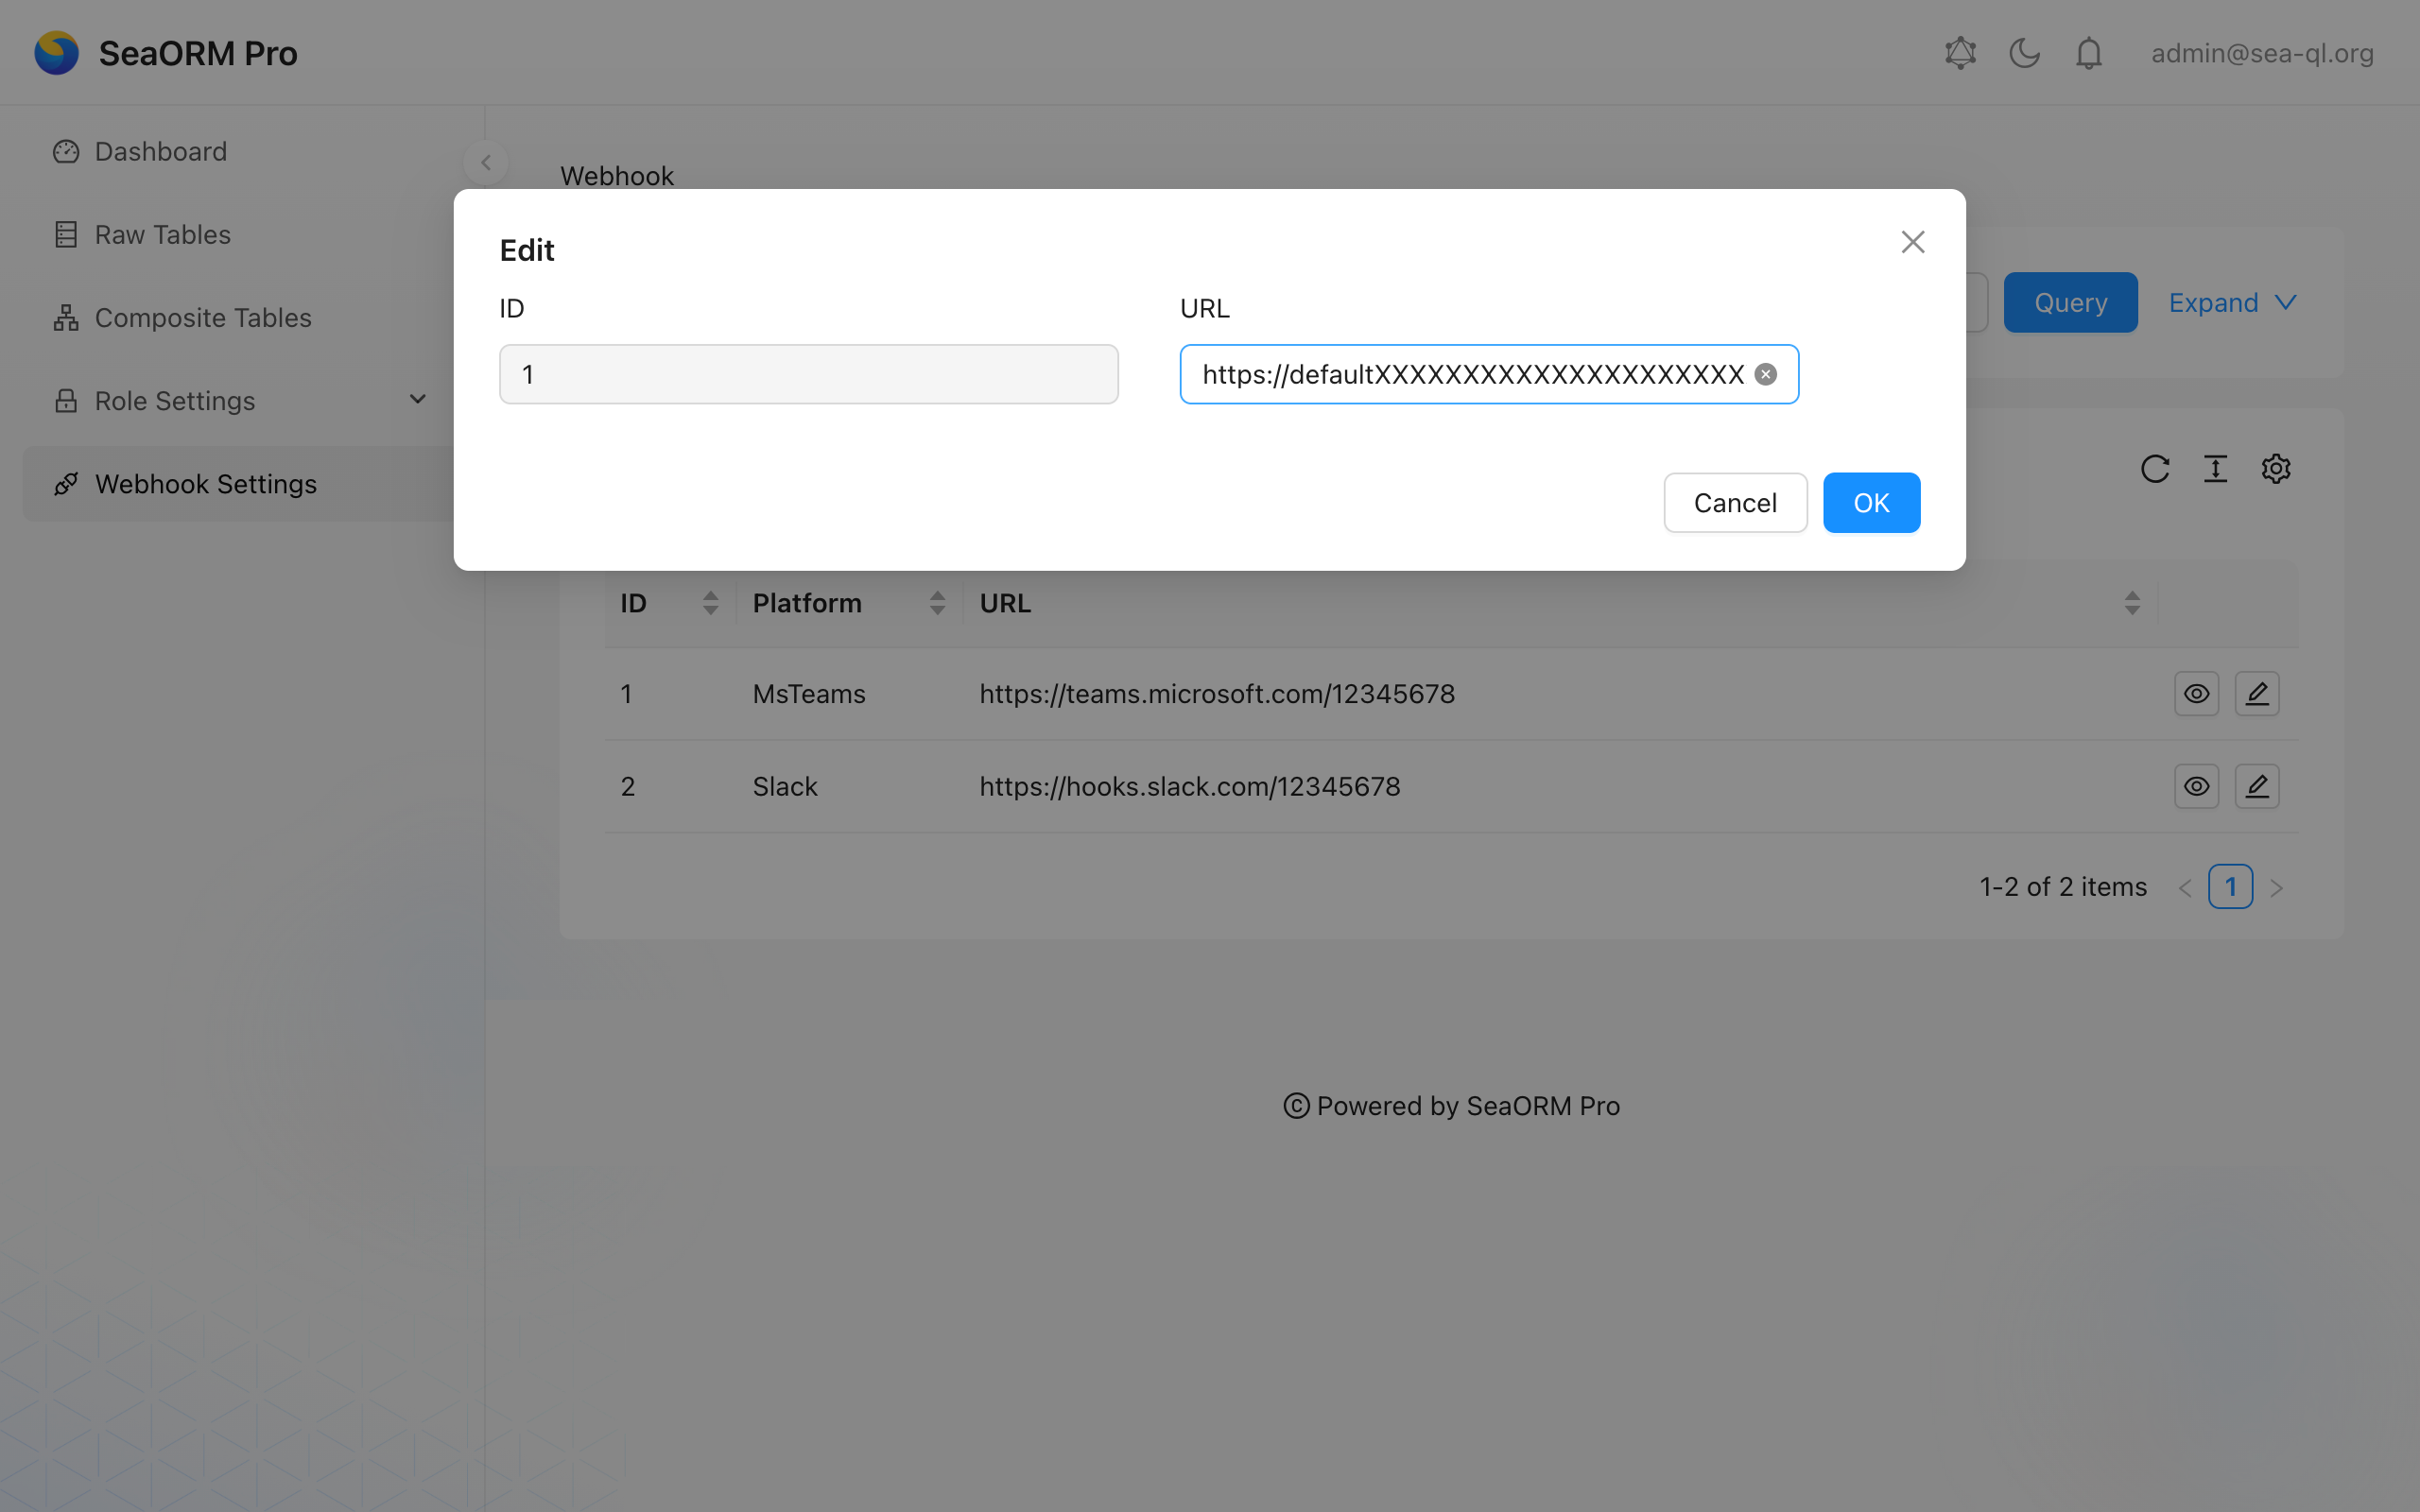
Double check the webhook URL is correct.
Config Webhook programatically
You can also create new webhooks using database migration, such as m20260101_000001_webhook.rs:
use sea_orm::{ActiveModelTrait, EntityName, NotSet, Set};
use sea_orm_migration::prelude::*;
use sea_orm_notify::entity::{notification, webhook::{self, WebhookPlatform}};
use sea_orm_rbac::context::RbacContext;

#[derive(DeriveMigrationName)]
pub struct Migration;

#[async_trait::async_trait]
impl MigrationTrait for Migration {
    async fn up(&self, manager: &SchemaManager) -> Result<(), DbErr> {
        let db = manager.get_connection();
        sea_orm_notify::create_tables(db).await?;

        webhook::ActiveModel {
            id: NotSet,
            platform: Set(WebhookPlatform::MsTeams),
            url: Set("https://teams.microsoft.com/12345678".to_owned()),
        }
        .insert(db)
        .await?;

        webhook::ActiveModel {
            id: NotSet,
            platform: Set(WebhookPlatform::Slack),
            url: Set("https://hooks.slack.com/12345678".to_owned()),
        }
        .insert(db)
        .await?;

        // ...
    }

    async fn down(&self, manager: &SchemaManager) -> Result<(), DbErr> {
        // ...
    }
}
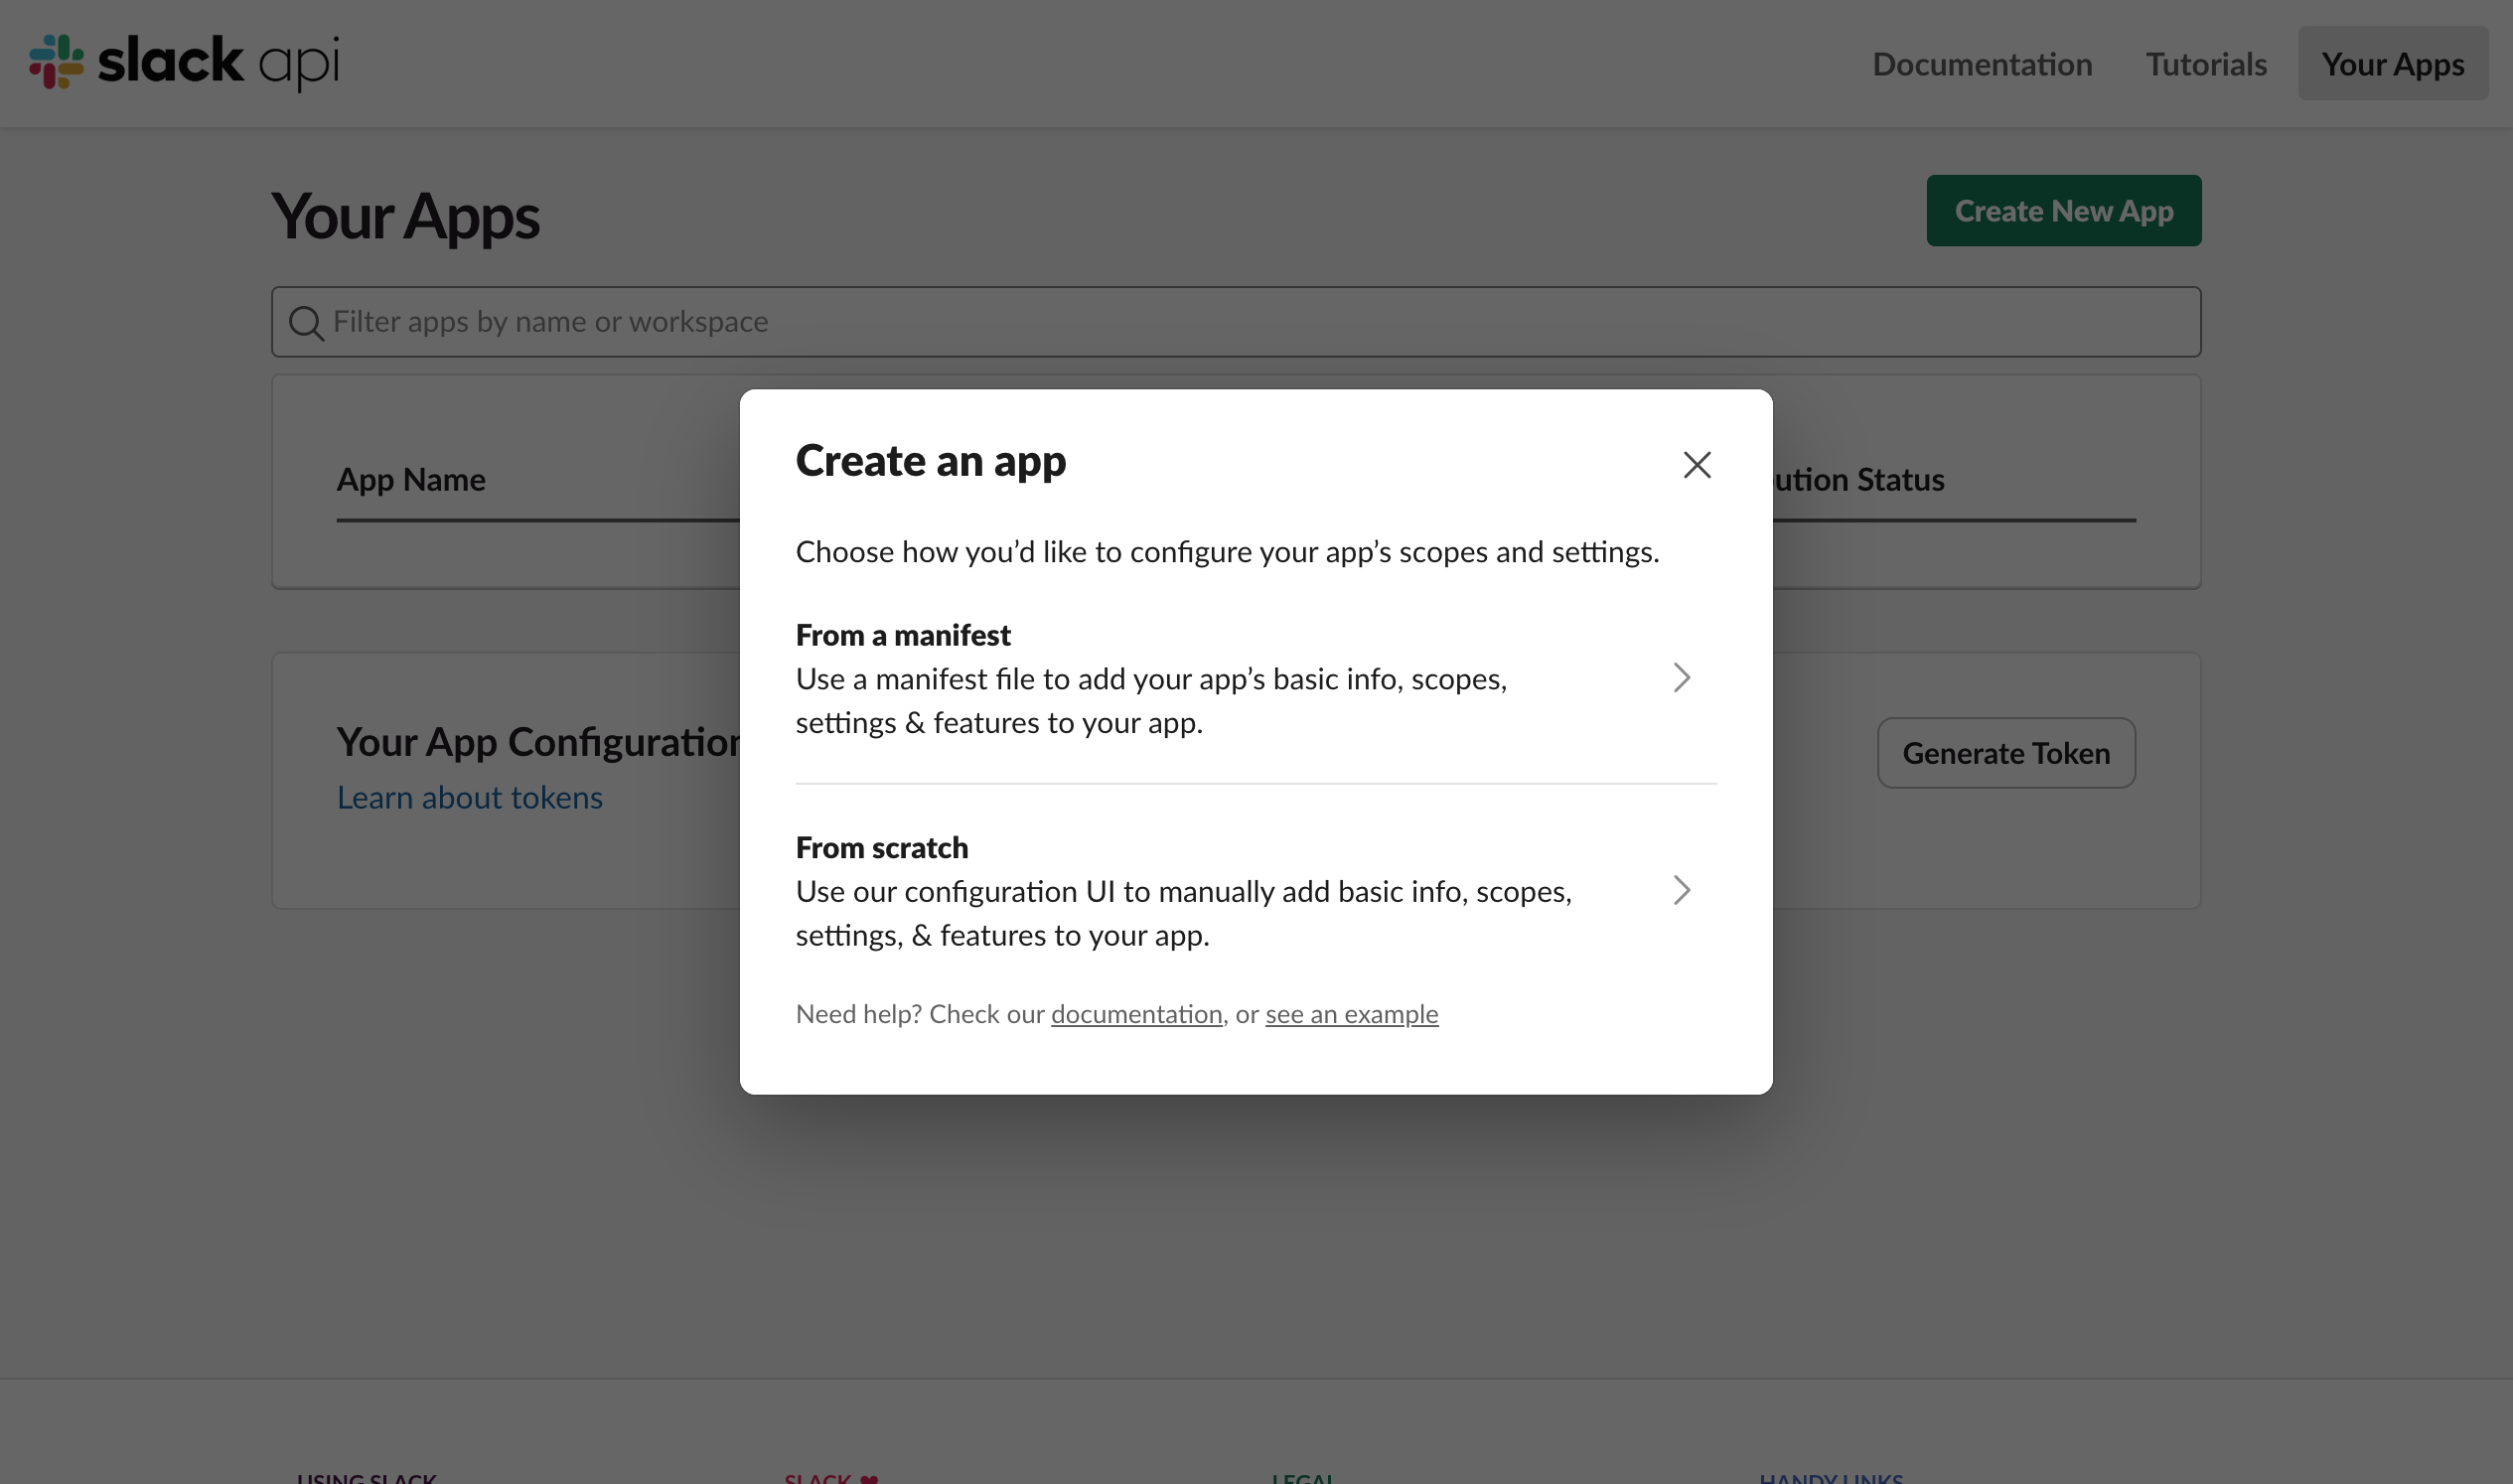
Setup Webhook for Slack
- Visit https://api.slack.com/apps?new_app=1, click "From scratch".
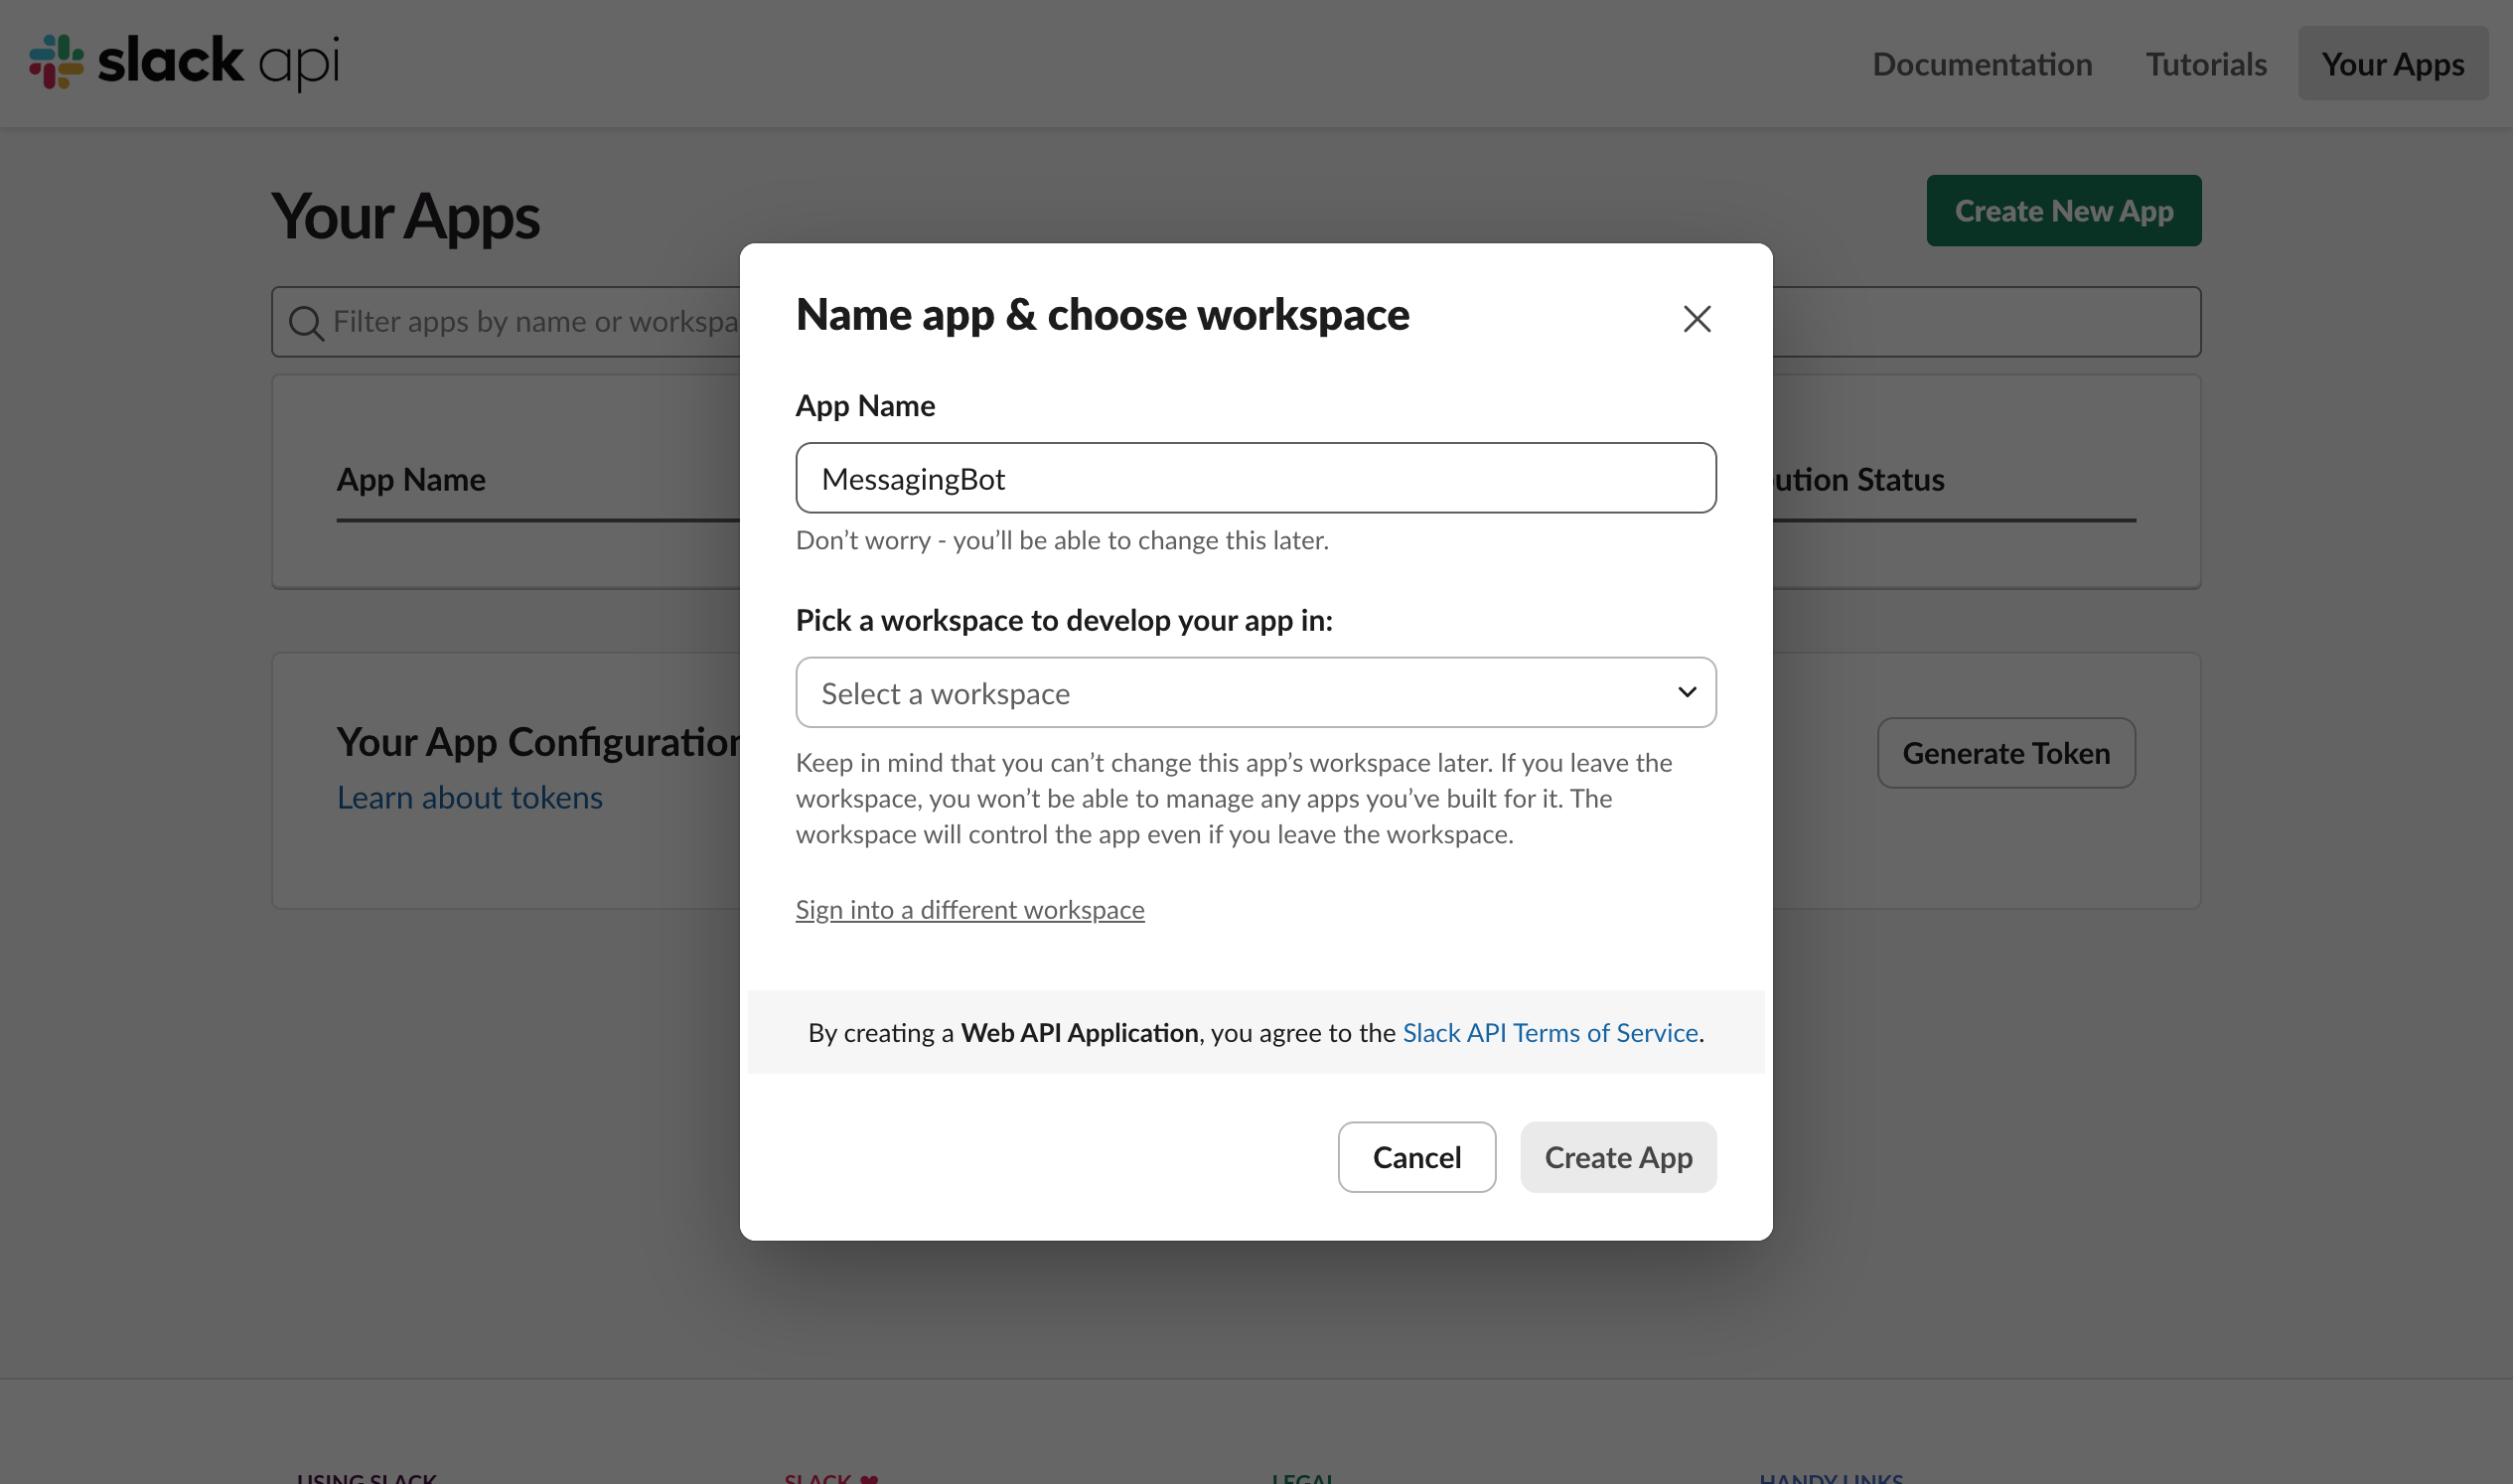
- Enter App Name and select the Workspace you wish to deploy on.
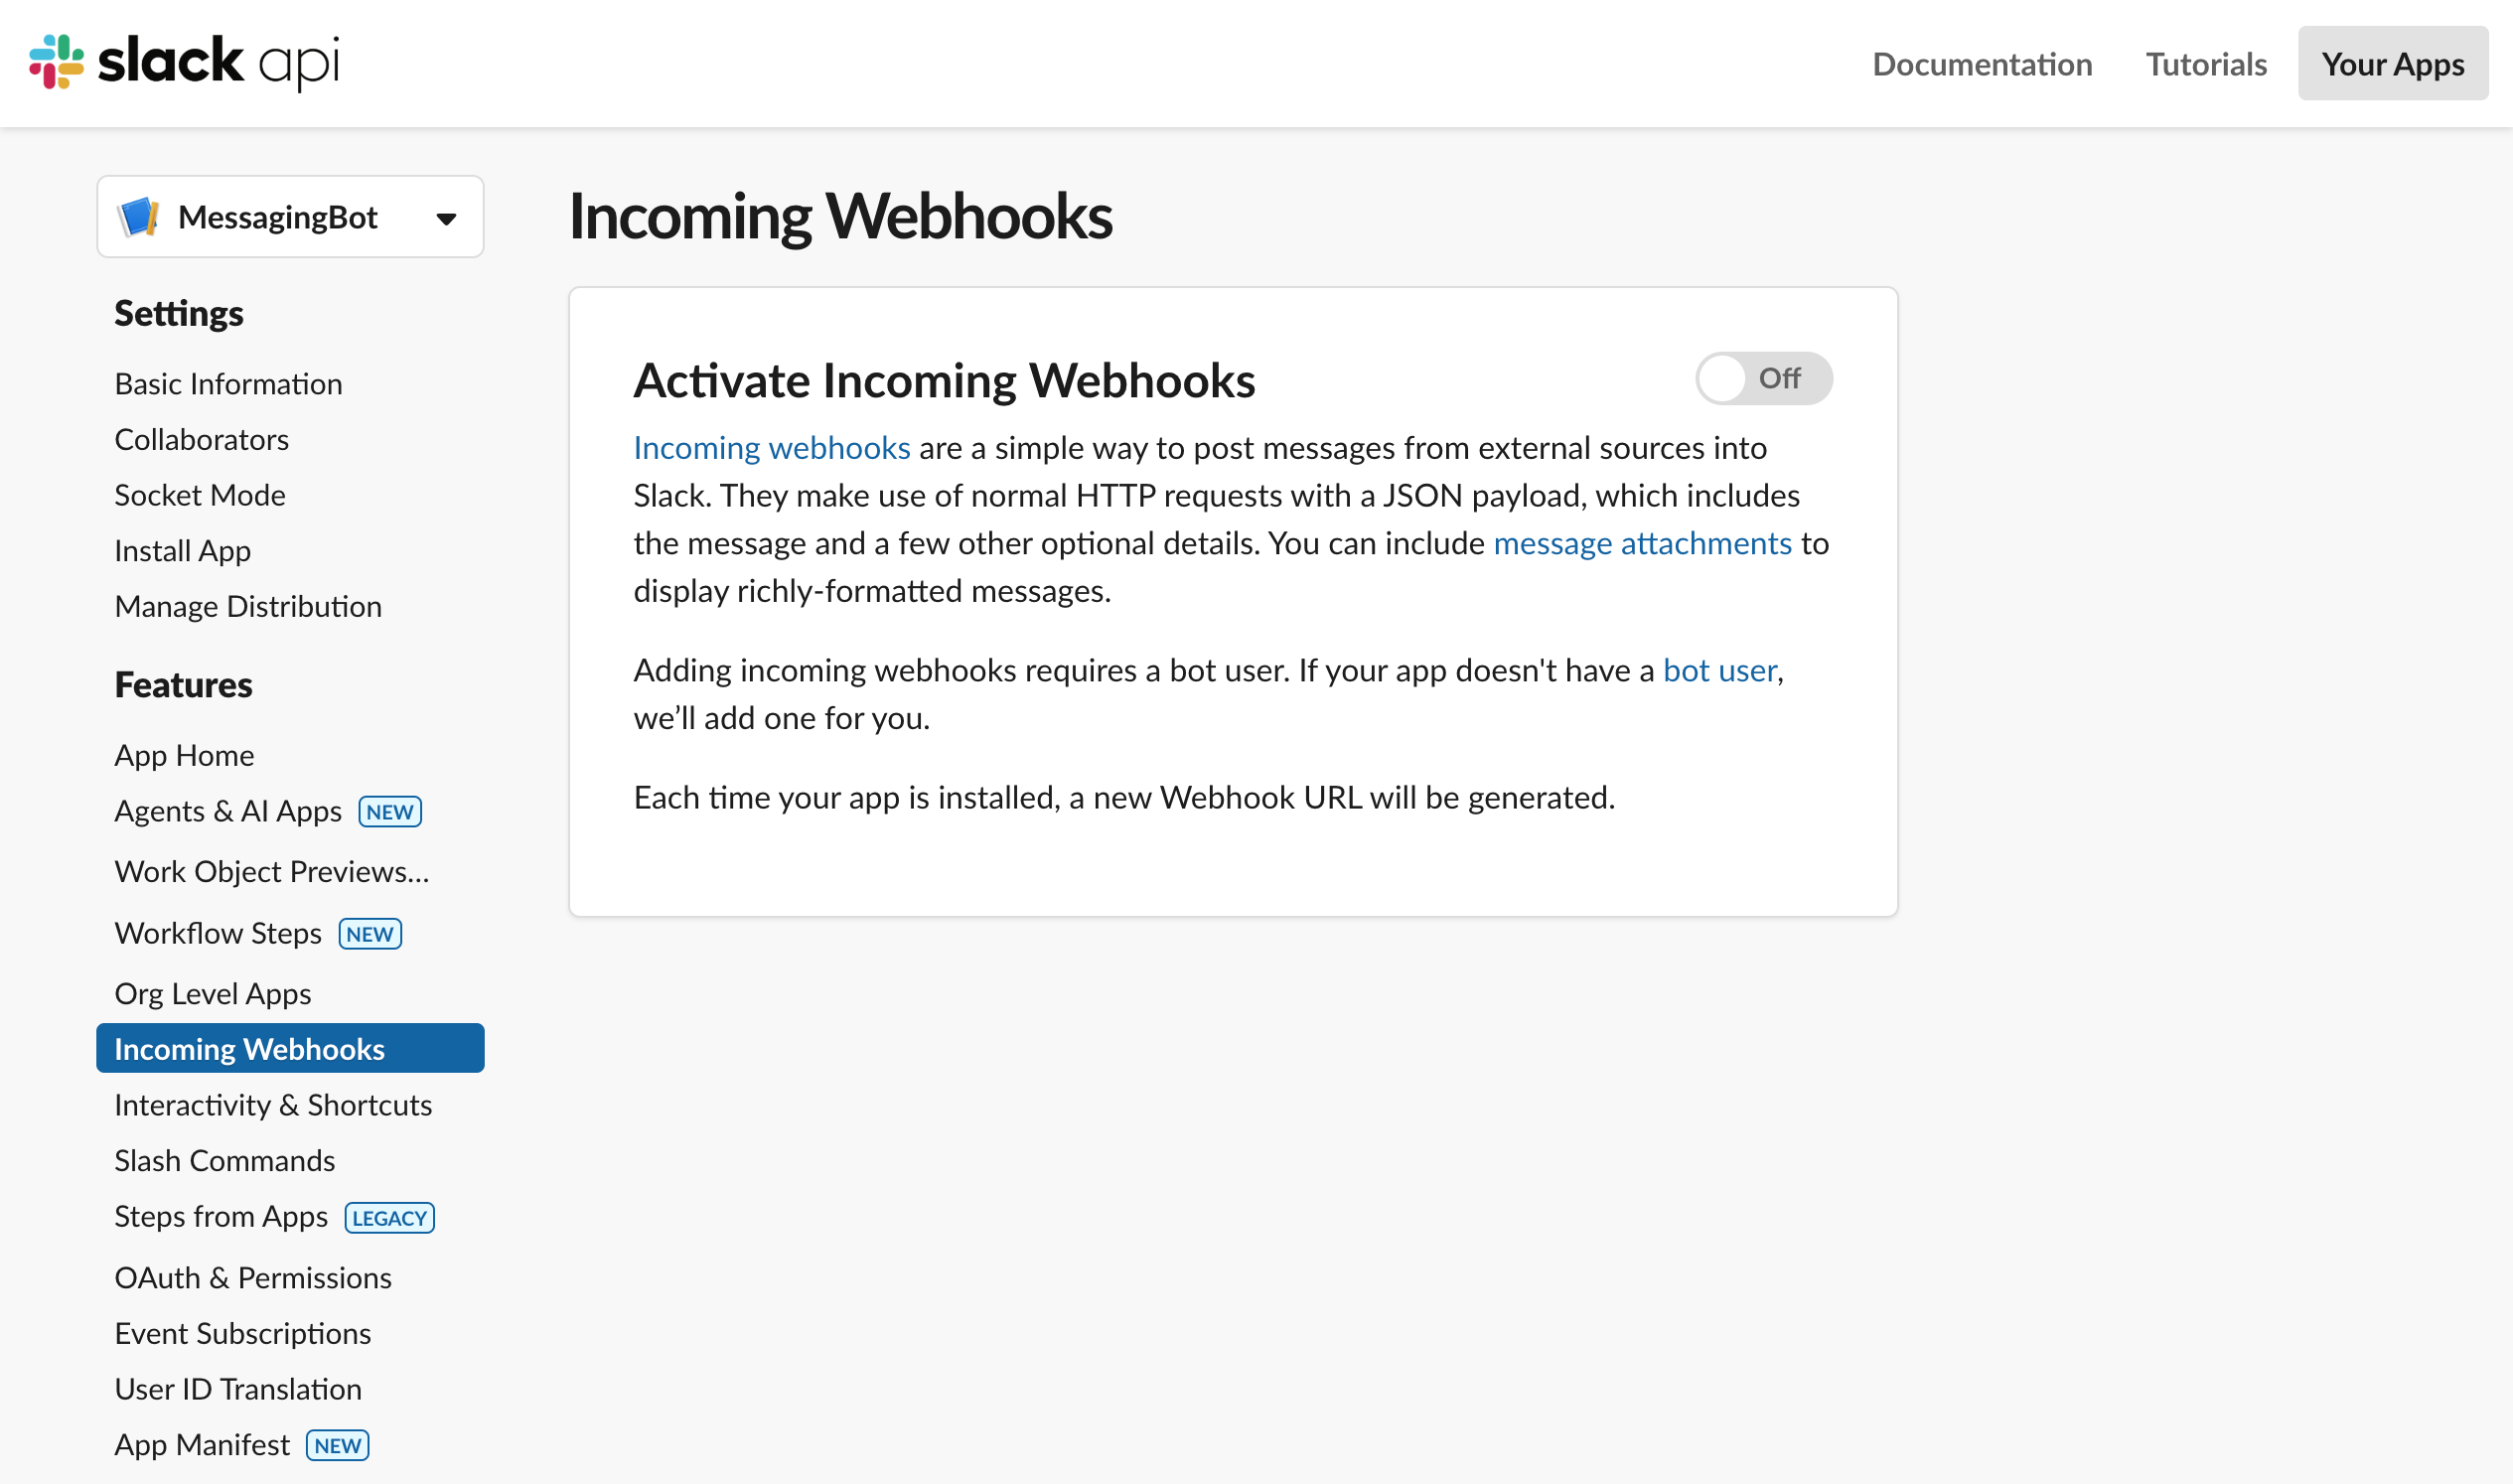
- App created. You should see the "Incoming Webhooks" option on the left navigation click on it.

- Turn on the "Incoming Webhooks". The web page should refresh automatically.
- Click on the "Add New Webhook".
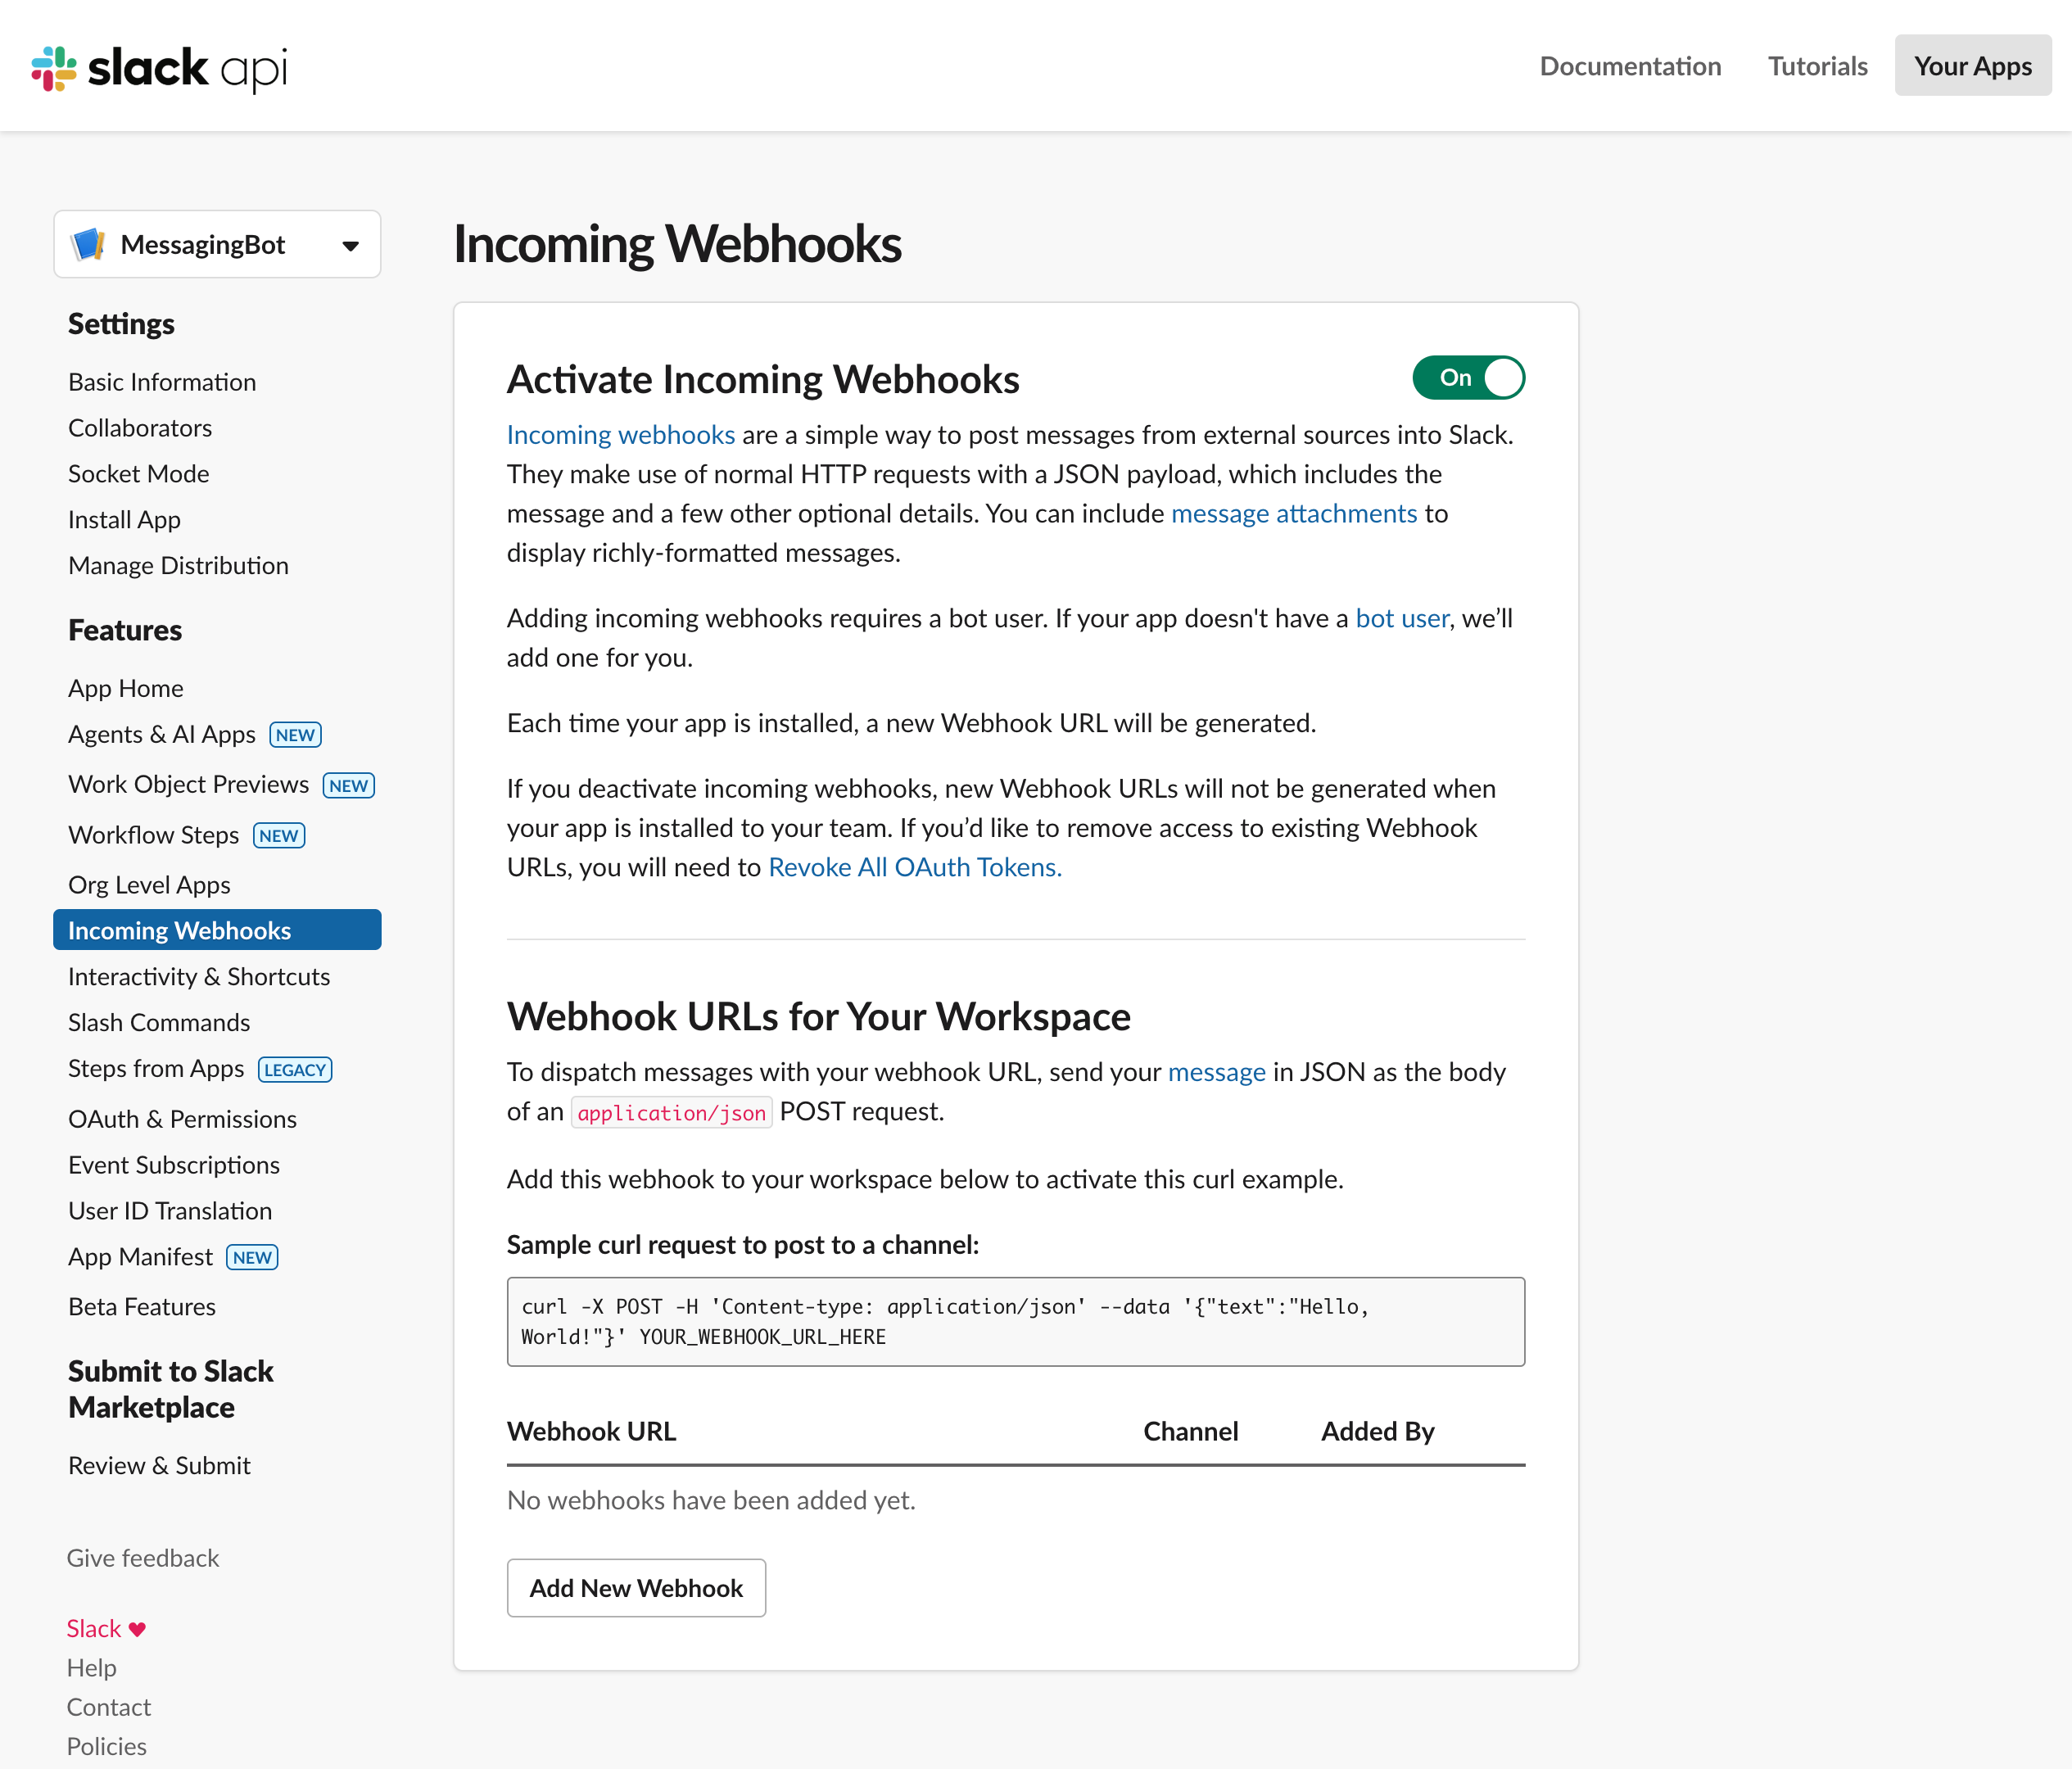
- Select a channel that the app will post to, then select "Authorize".

- Then you should see the webhook URL like
https://hooks.slack.com/services/T00000000/B00000000/XXXXXXXXXXXXXXXXXXXXXXXX
Setup Webhook for Microsoft Teams
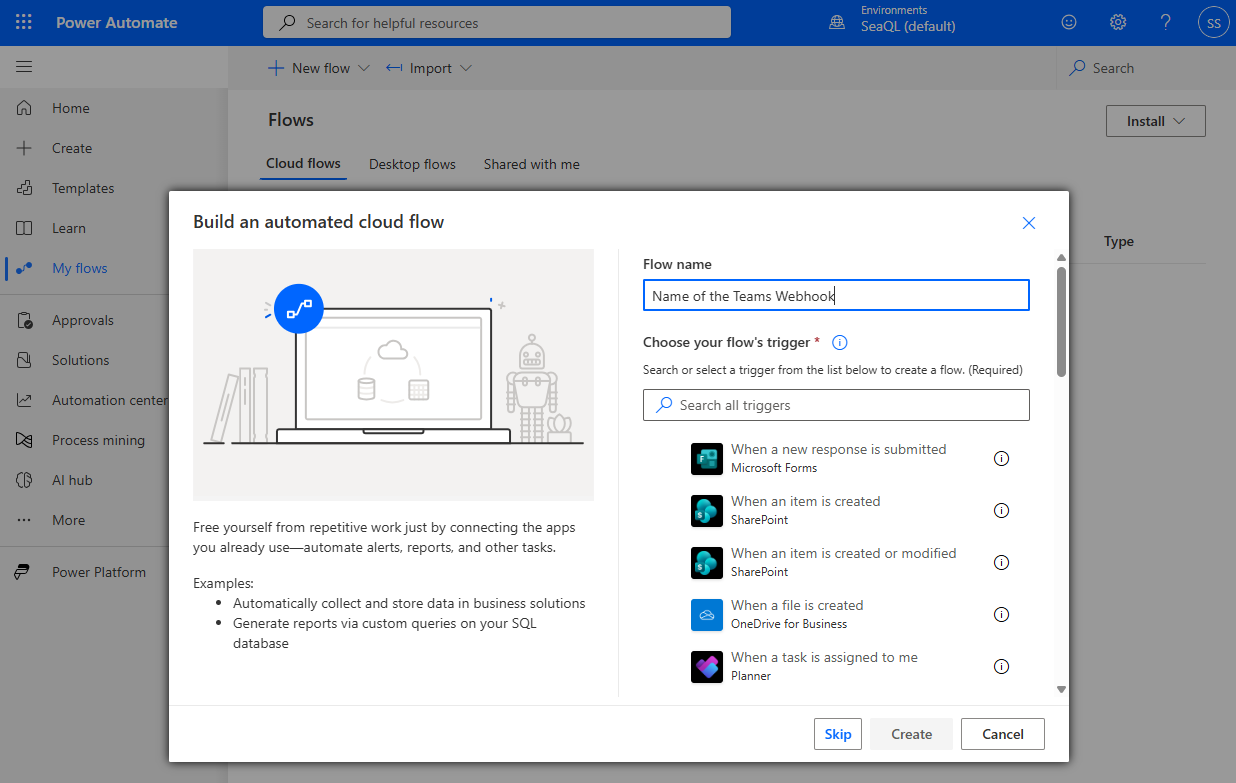
- Visit https://make.powerautomate.com/flows to create a new "Automated cloud flow".
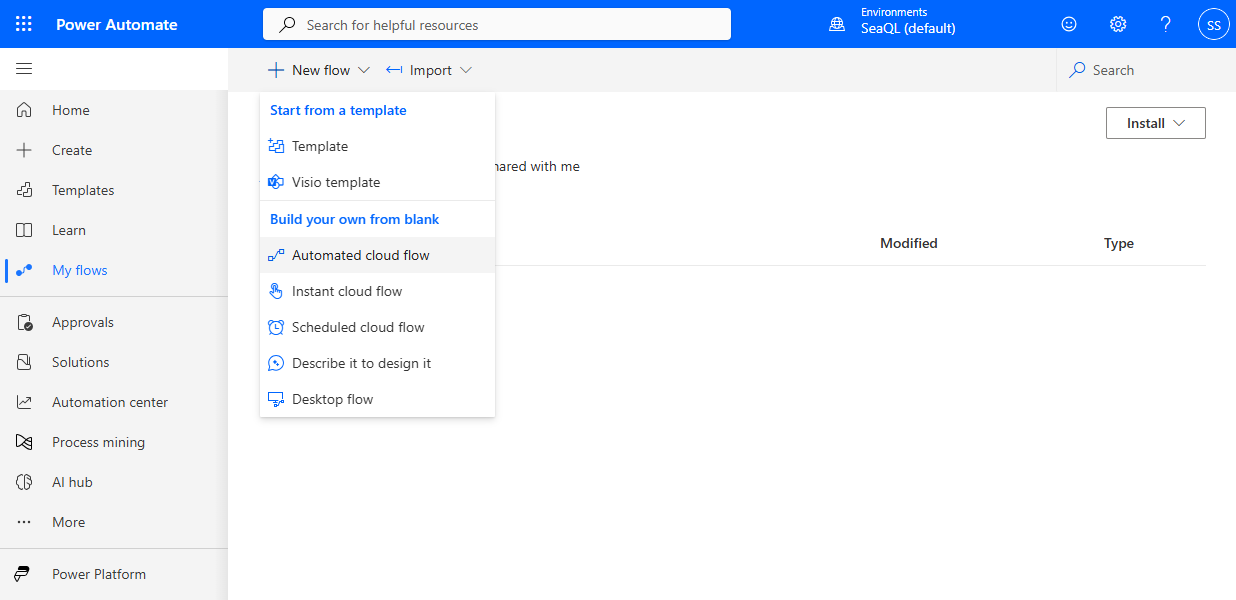
- Enter the name of the webhook then press "Skip".
- Click to add a trigger.
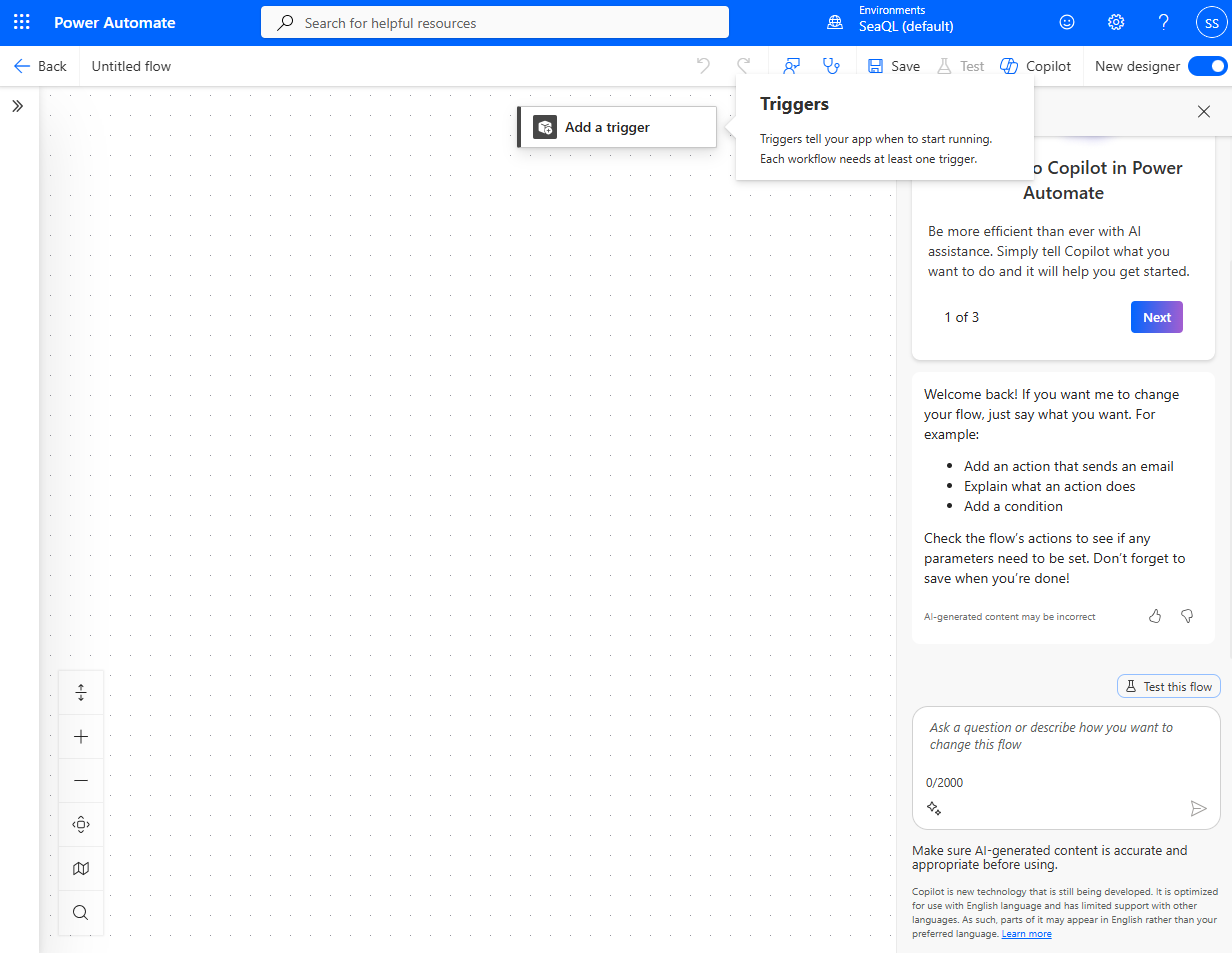
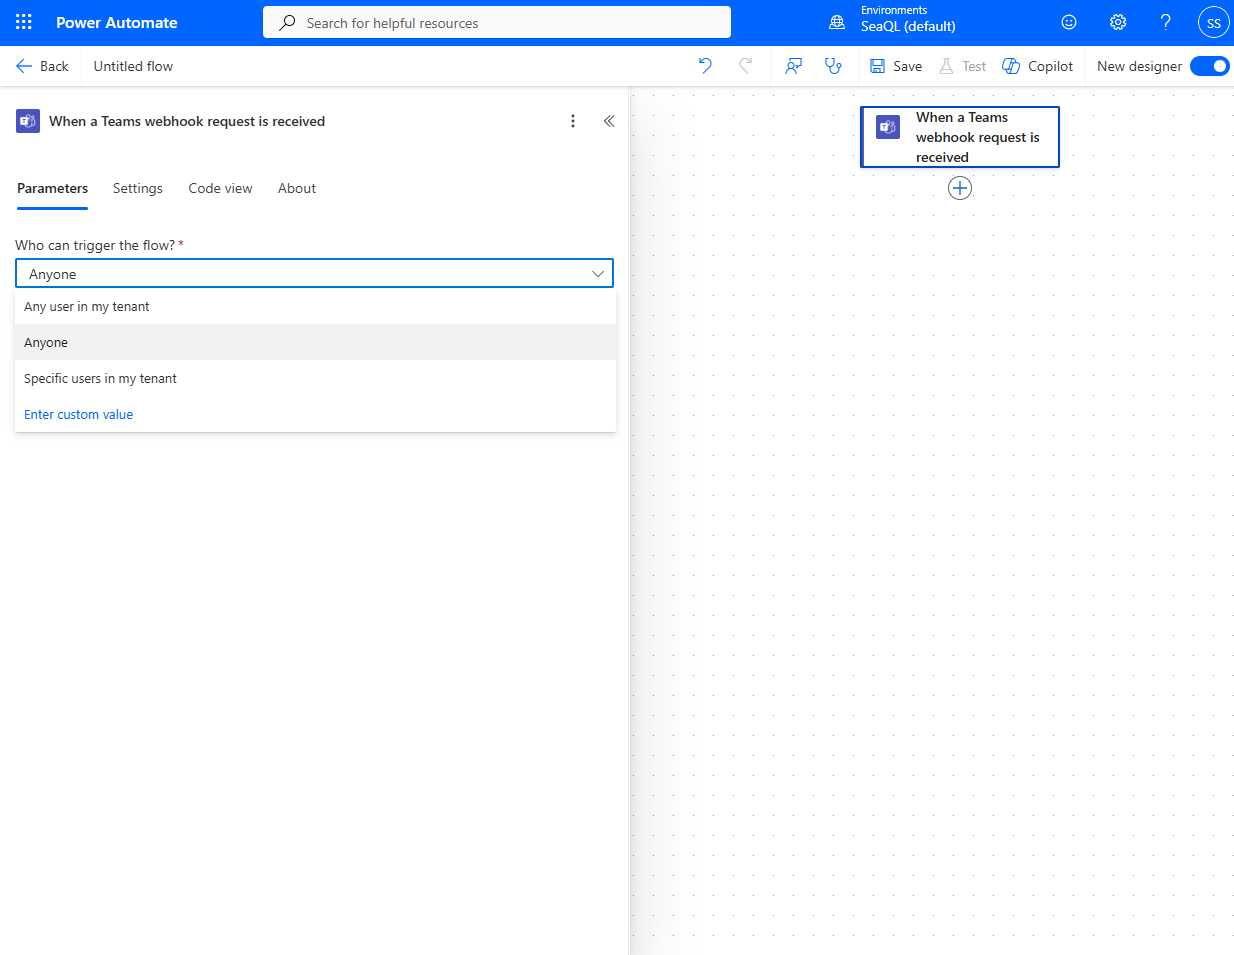
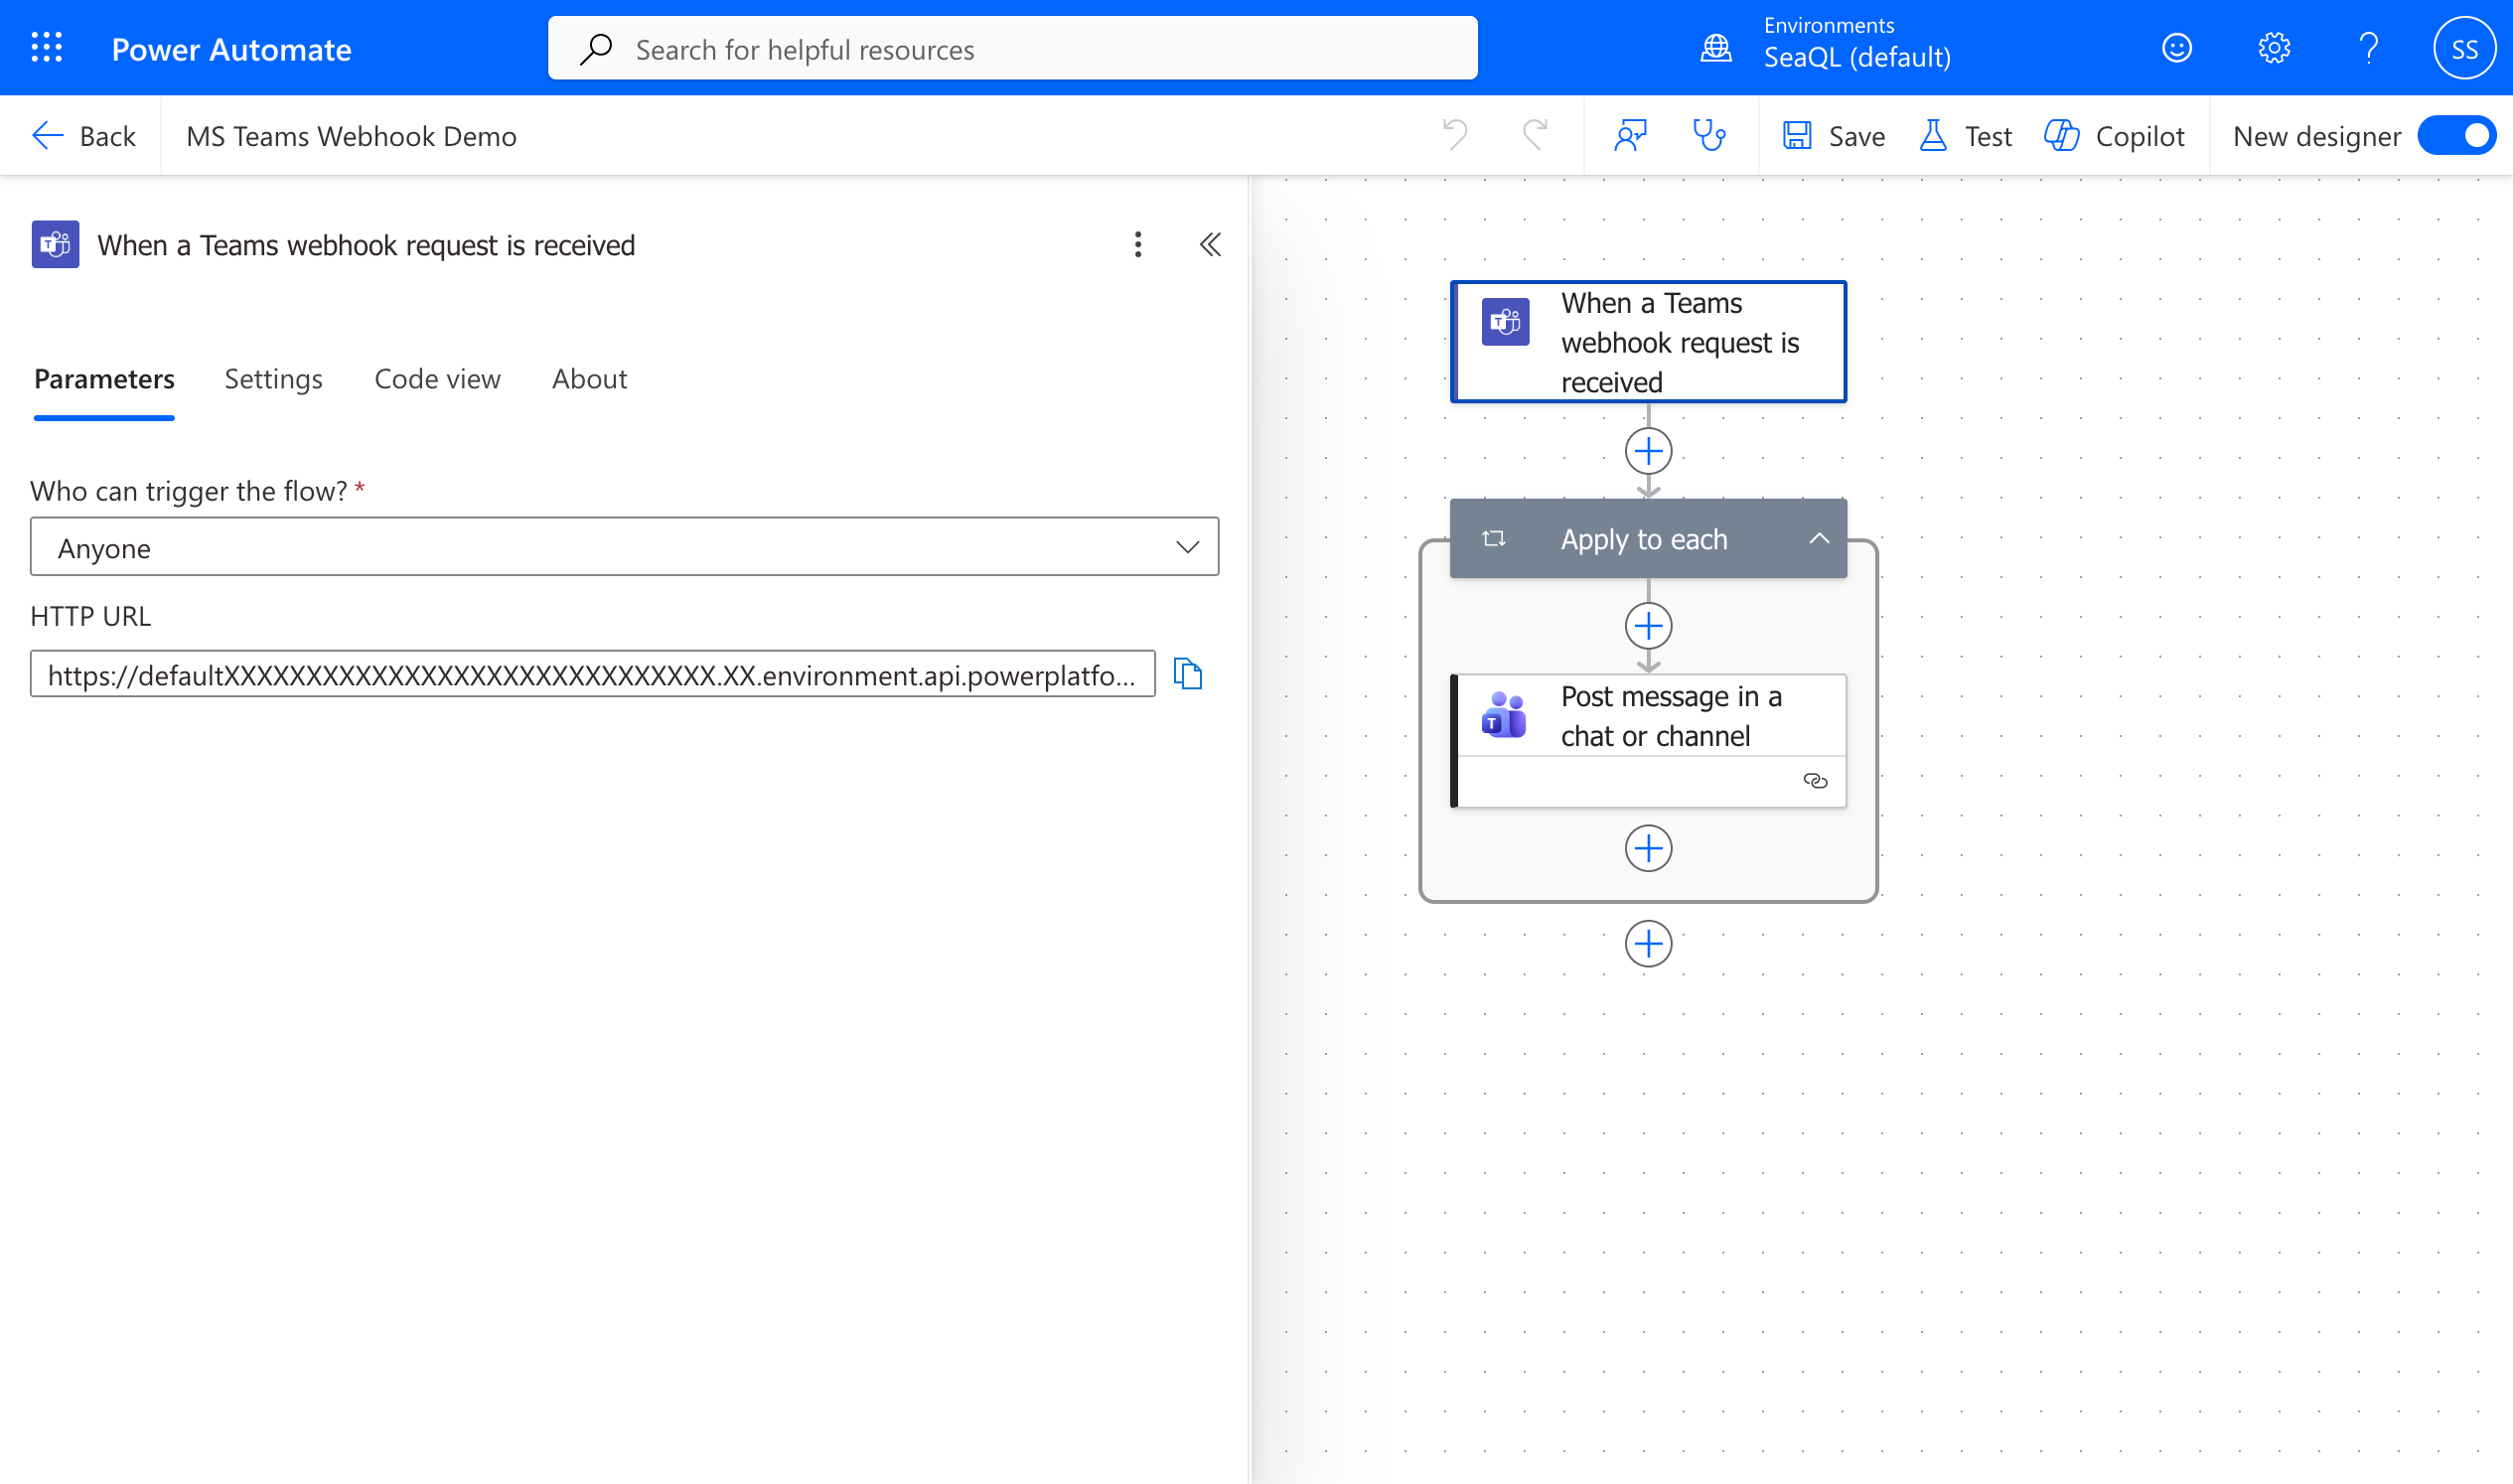
- The search and select the trigger: "When a Teams webhook request is received".
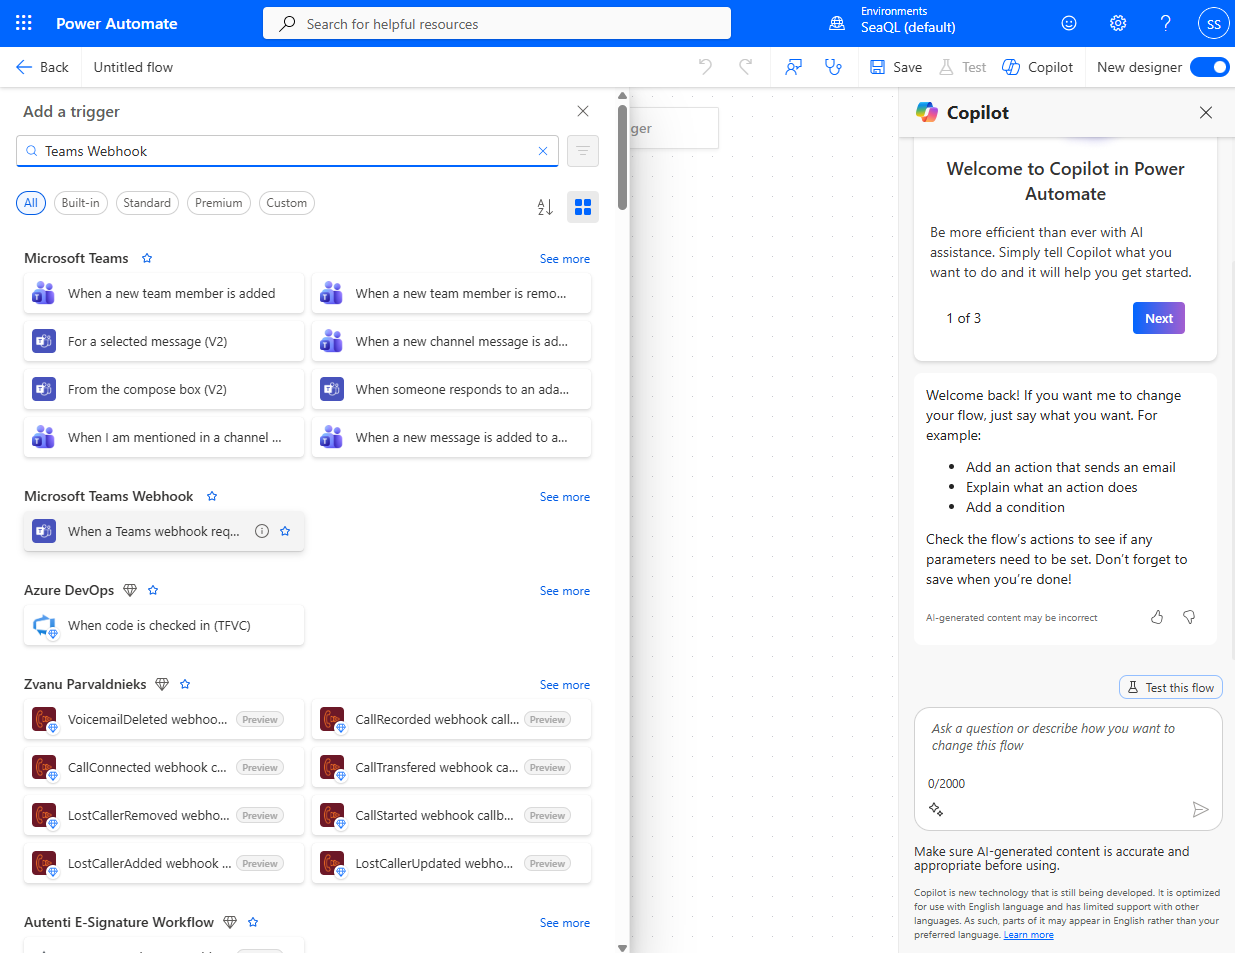
- Allow "Anyone" to trigger the webhook.
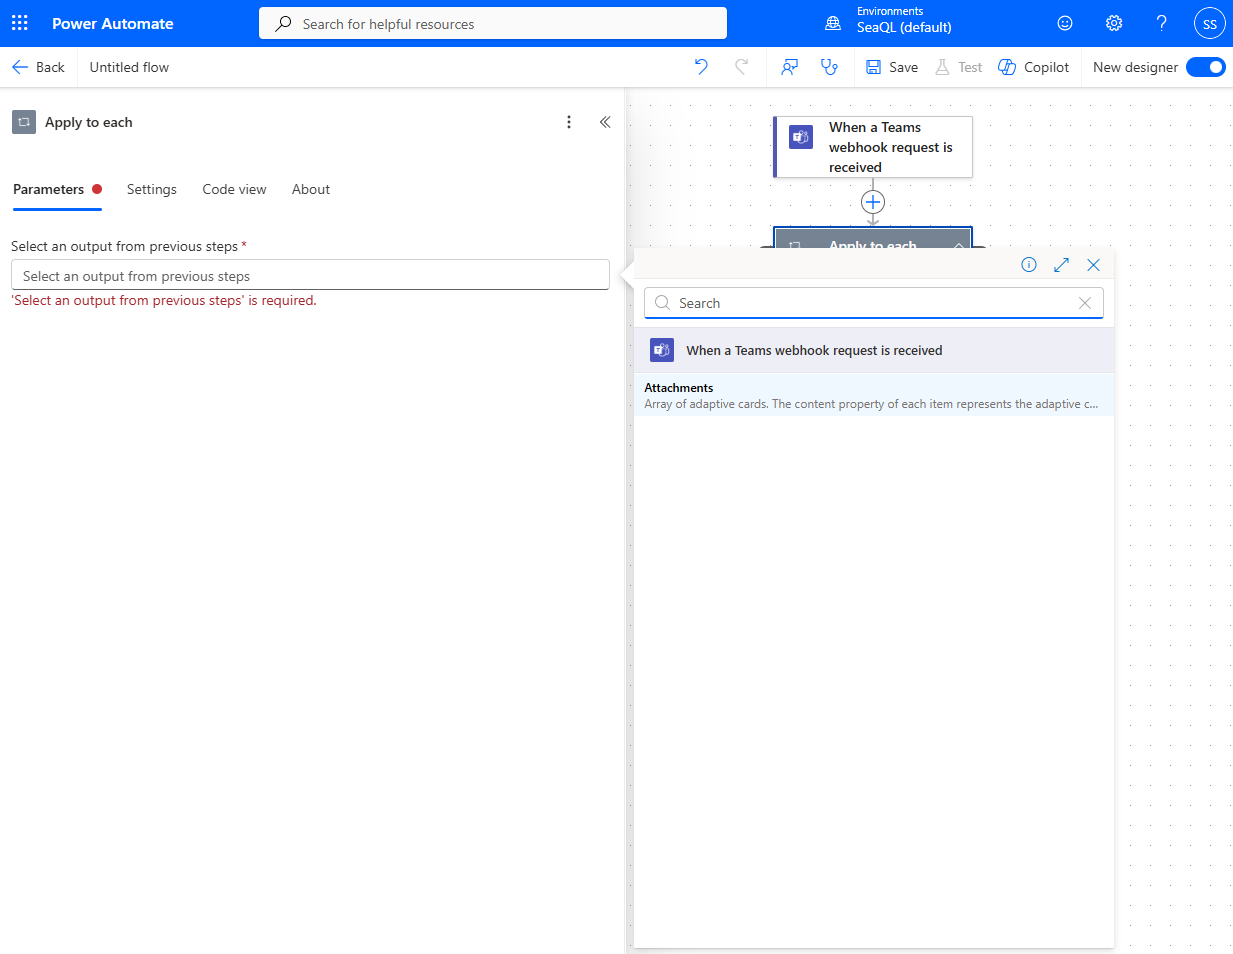
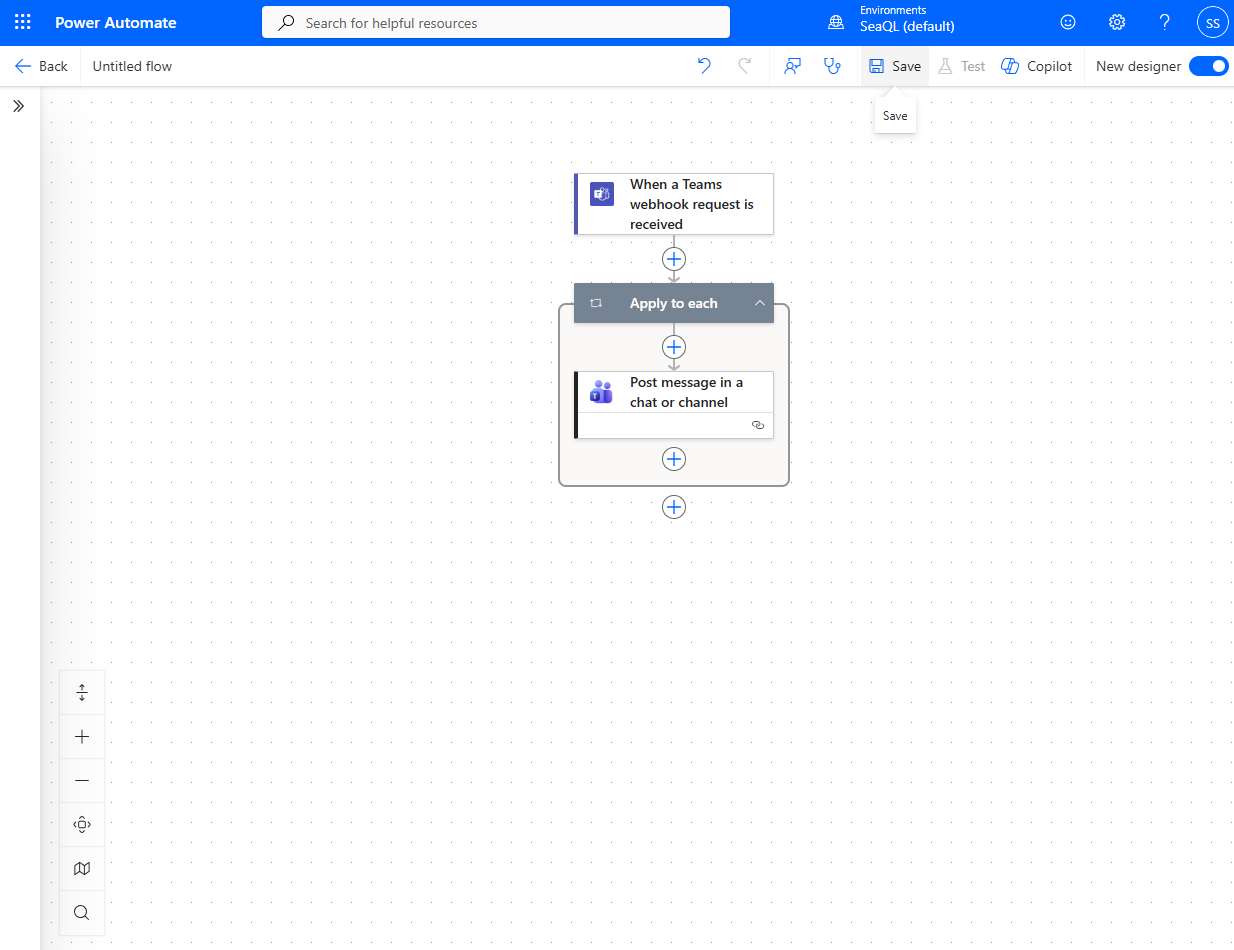
- When a webhook request is received, we would first perform the "Apply to each" action.
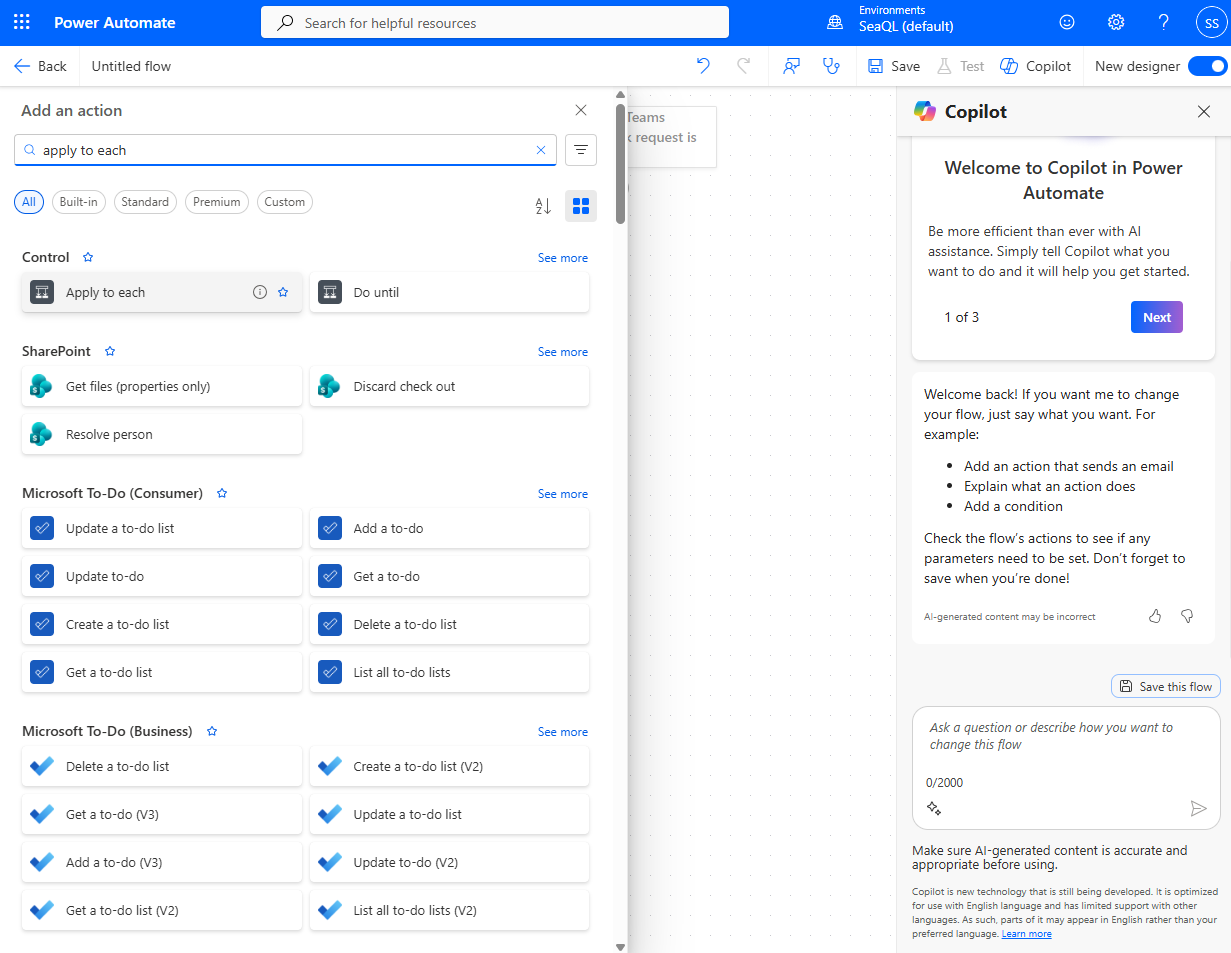
- We would take the input from the webhook request and loop through it. Click the "Flash Icon".
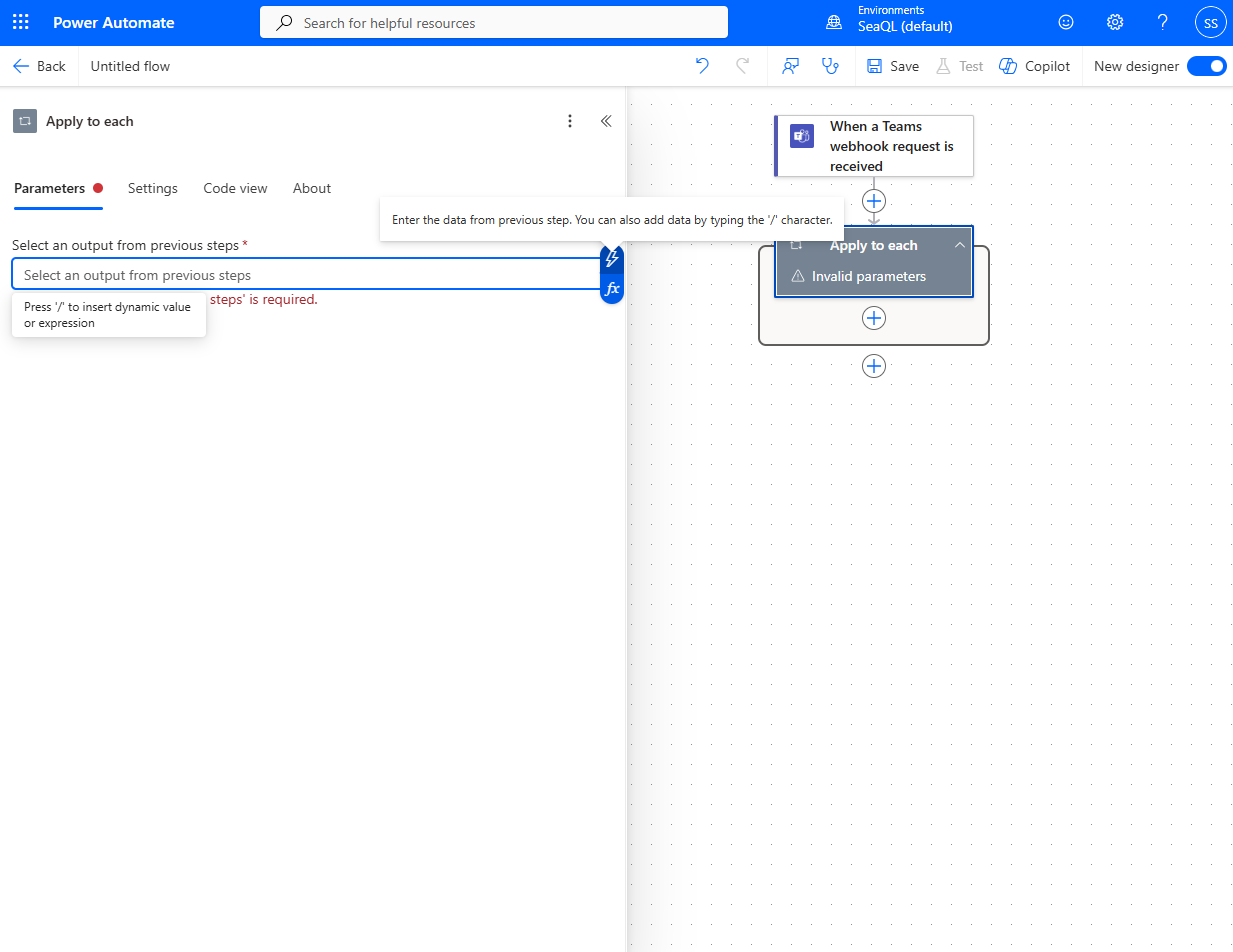
- Then, select the "Attachments" attribute.
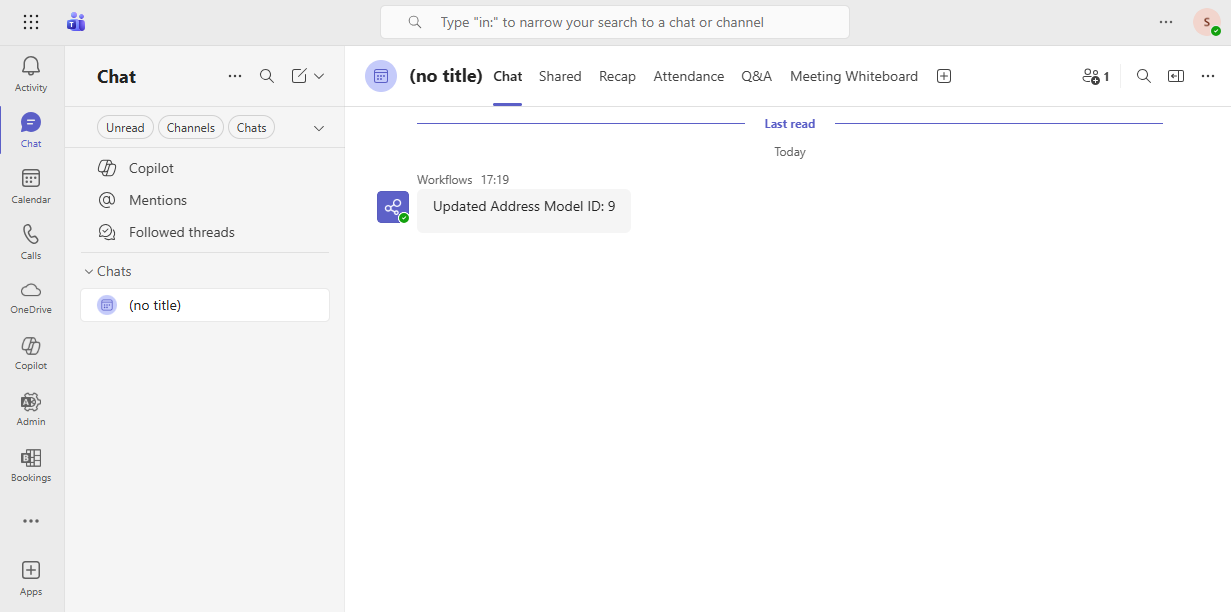
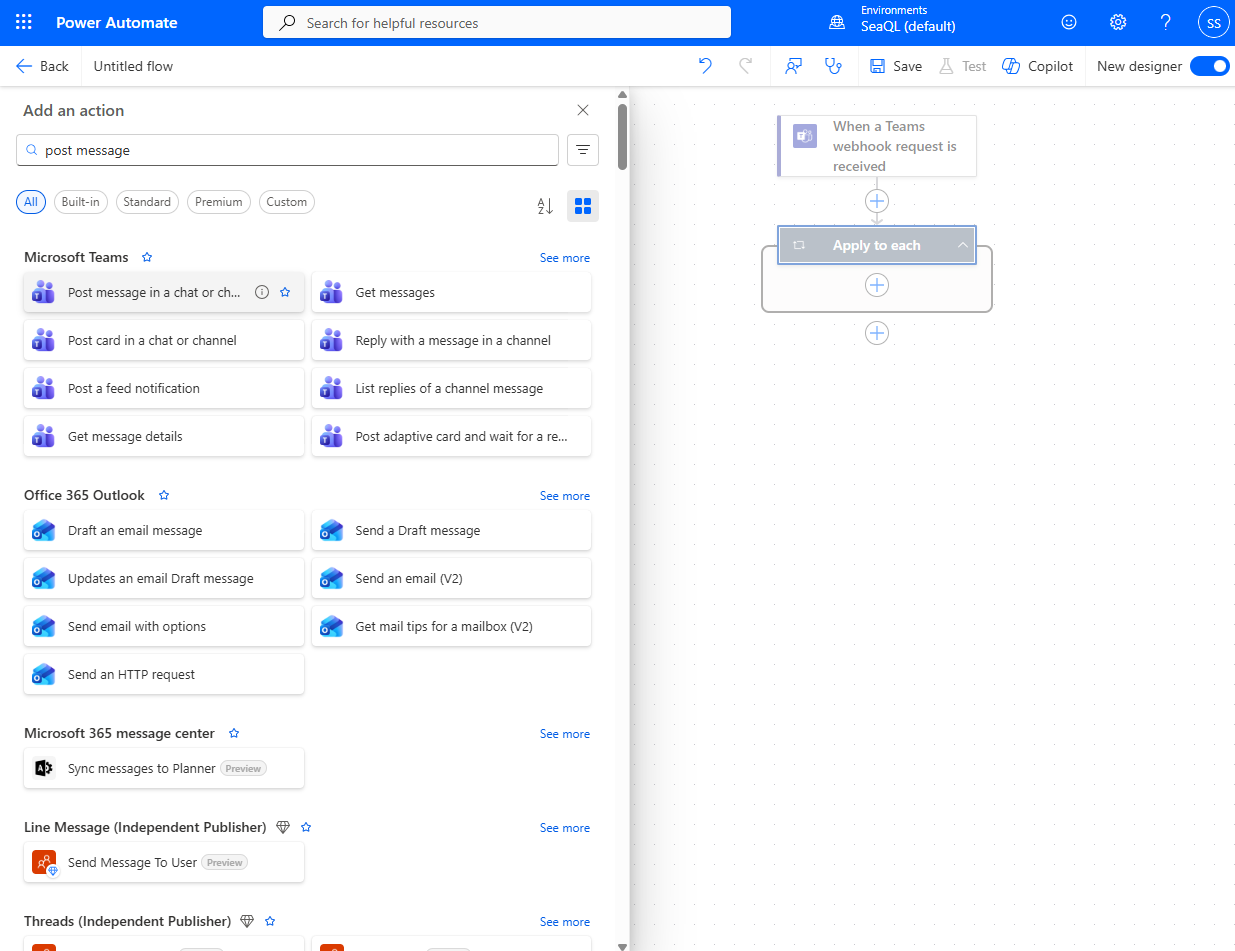
- Inside each iteration we will post a message to specific Teams chat / channel. Search and select the "Post a message in a chat or channel" action.
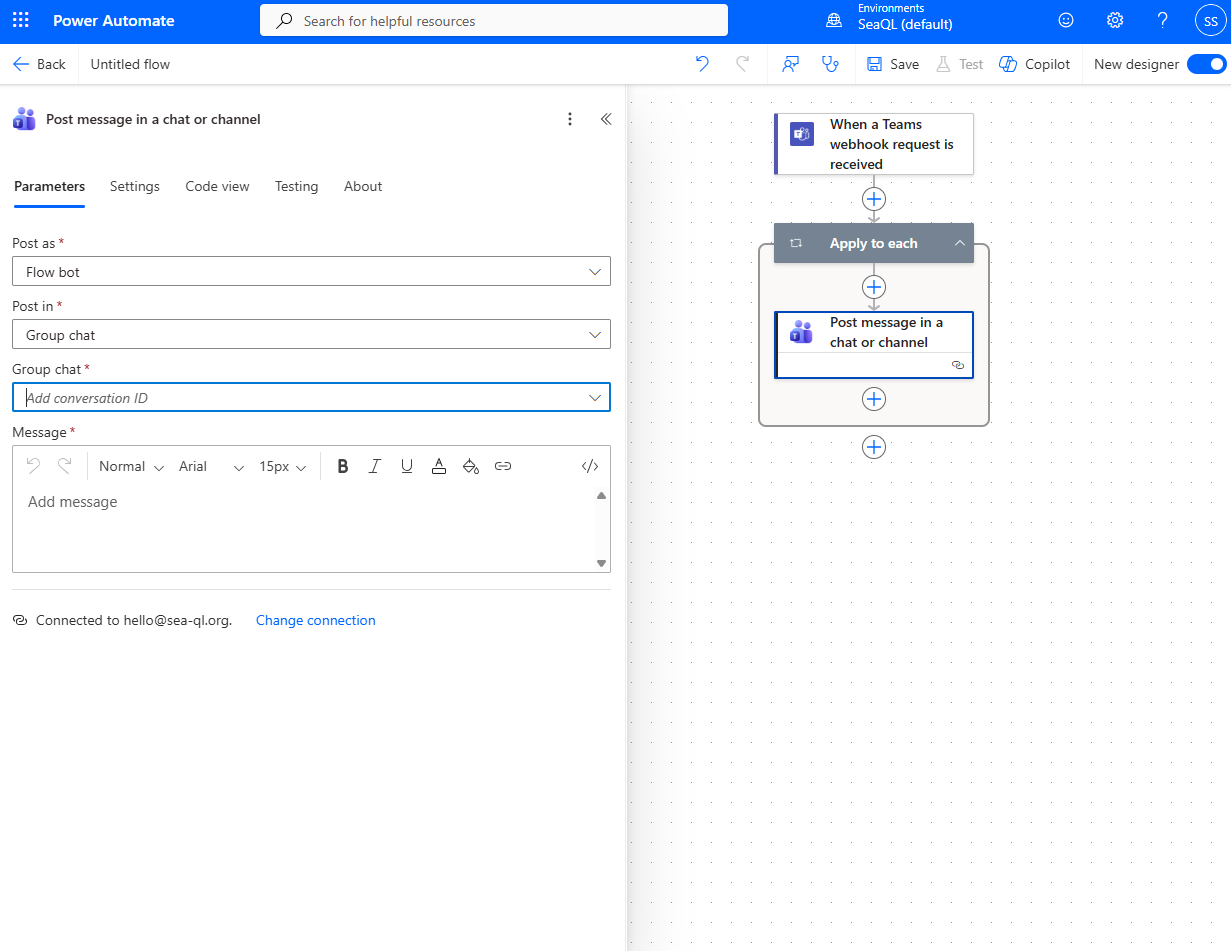
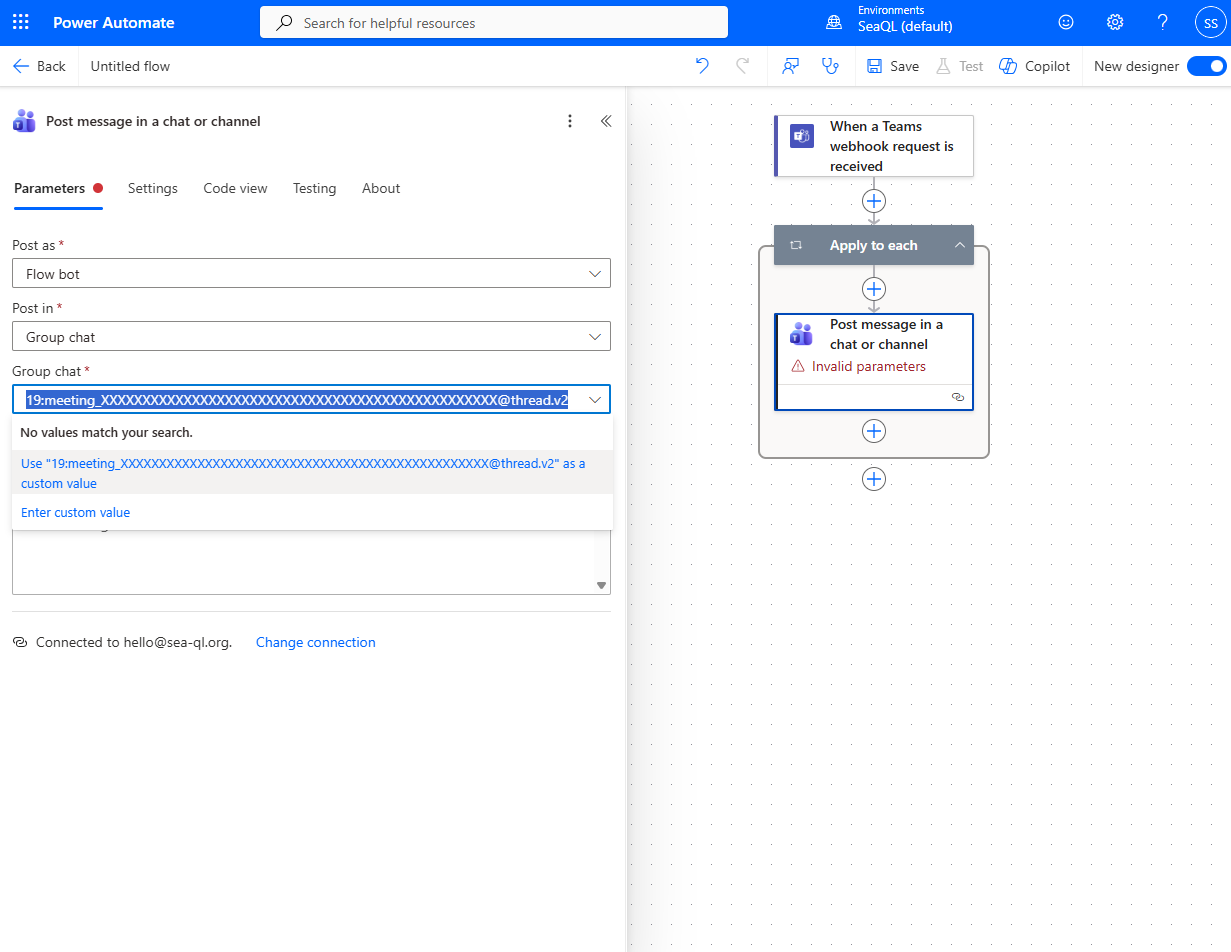
- Select post in "Group chat".
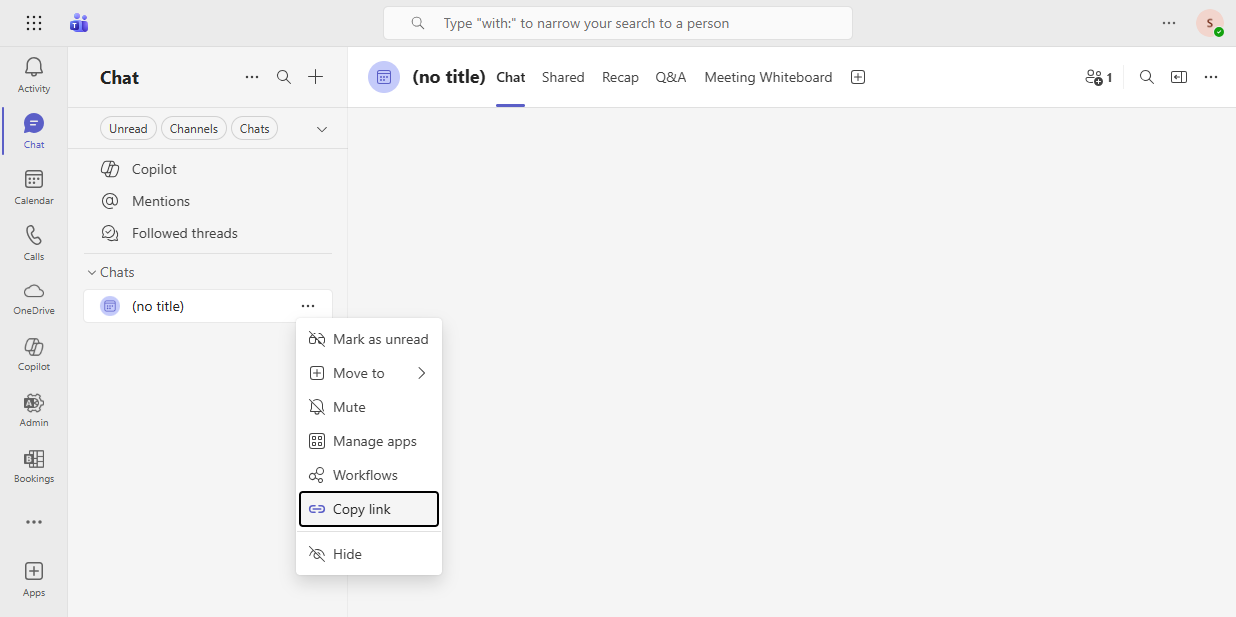
- For the conversation ID, you can find it on Microsoft Teams. Select a chat / channel then "Copy link", it will copy the link to to pasteboard, paste it to a text editor to view the link.
# For example the like might look like:
https://teams.cloud.microsoft/l/chat/19:meeting_XXXXXXXXXXXXXXXXXXXXXXXXXXXXXXXXXXXXXXXXXXXXXXXX@thread.v2/conversations

# This part of the link is the conversation ID:
19:meeting_XXXXXXXXXXXXXXXXXXXXXXXXXXXXXXXXXXXXXXXXXXXXXXXX@thread.v2
- Copy and paste the conversation ID as a custom value.
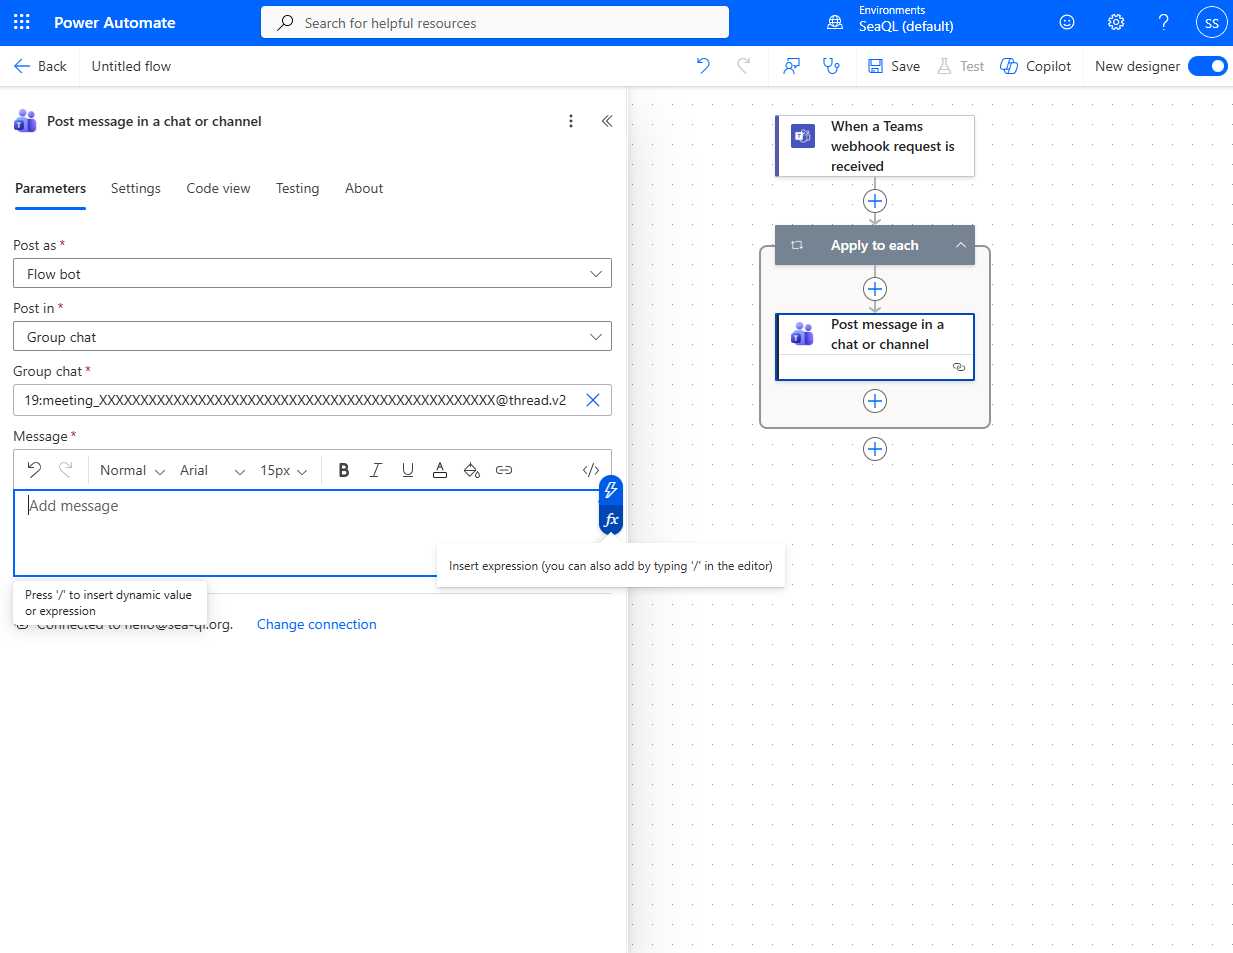
- For the message body, click the "Fx Icon" to add an expression.
- Select "Dynamic content" then click on "Attachment Item".
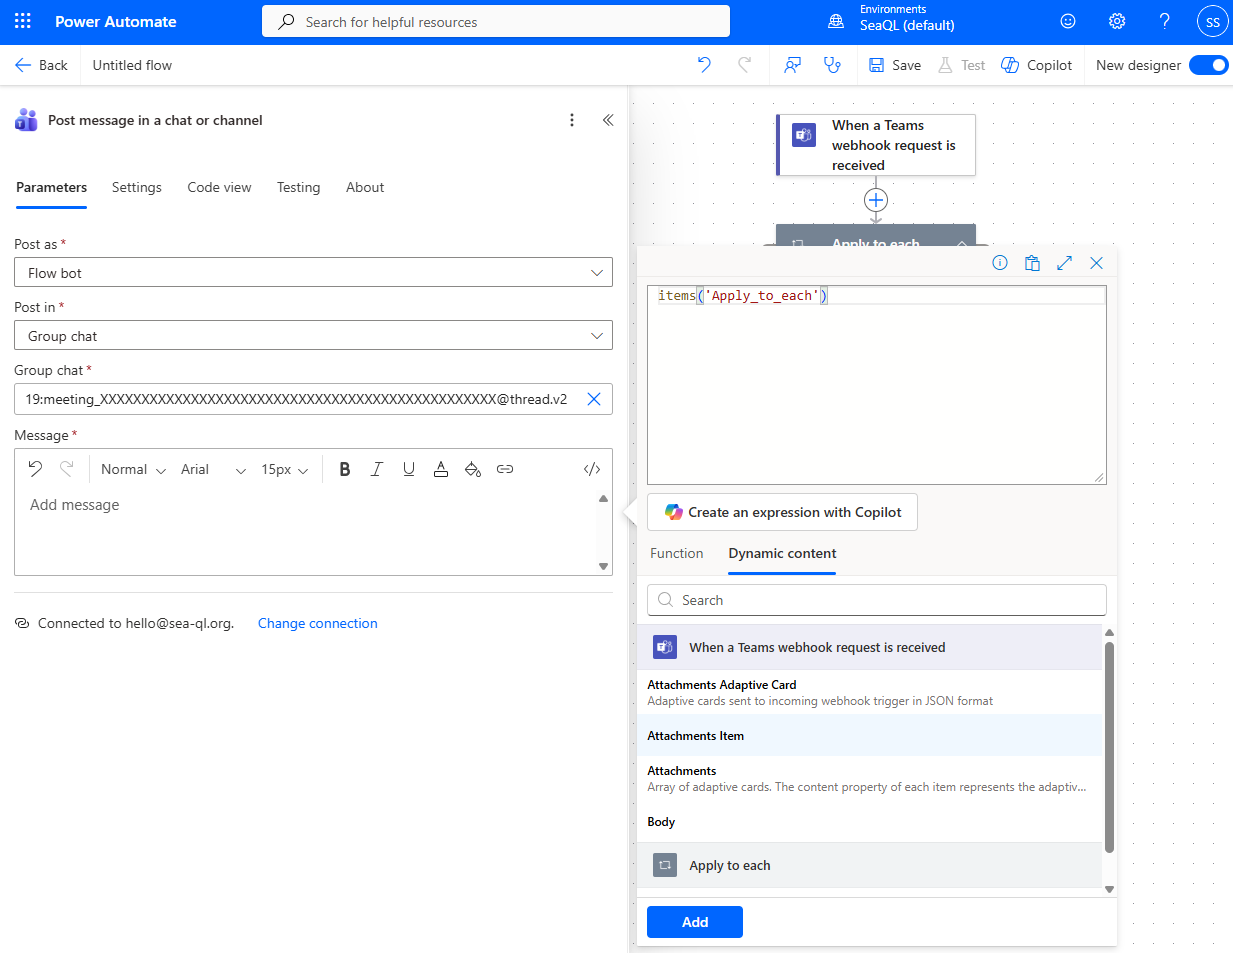
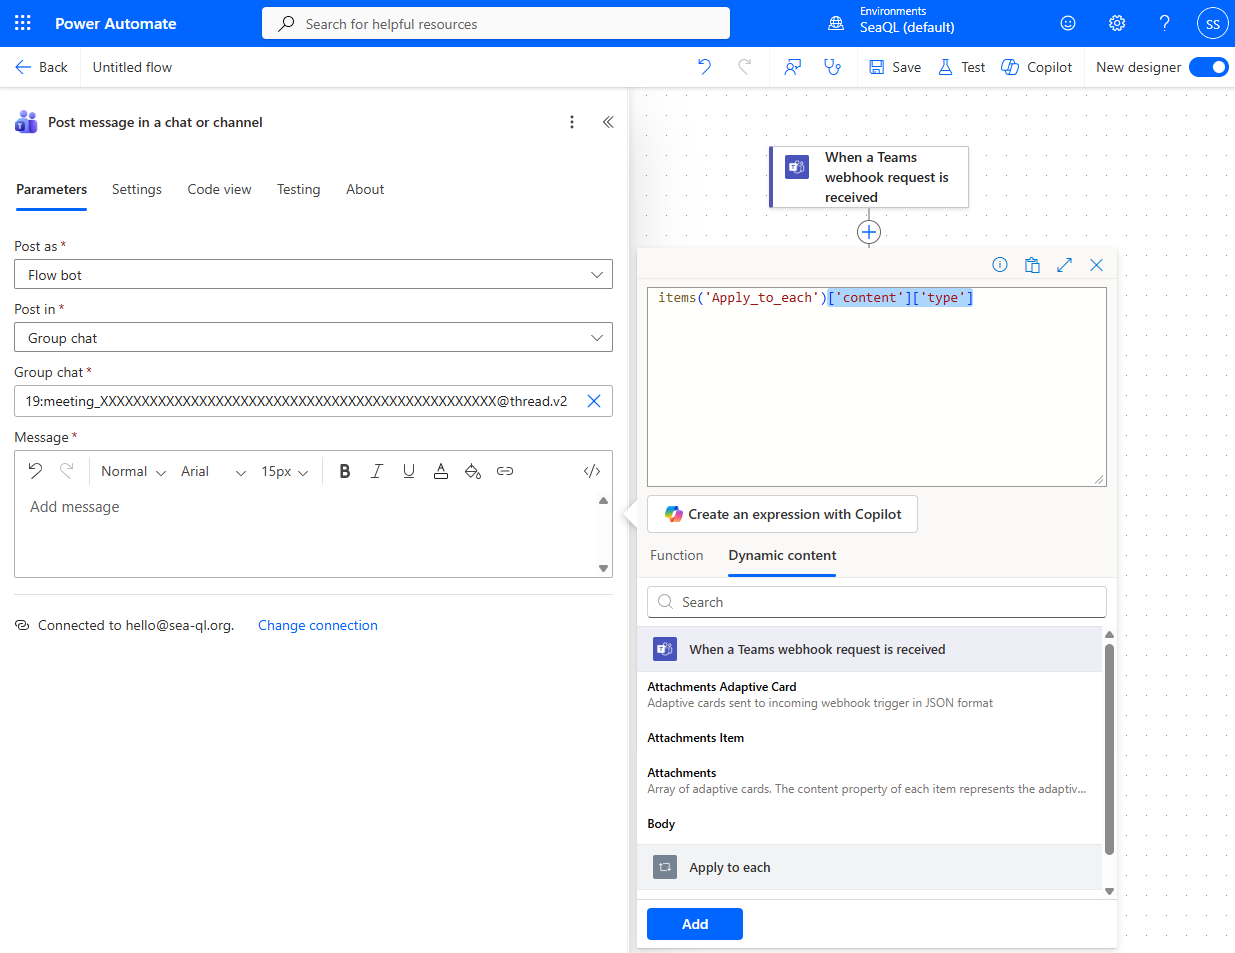
- Type directly in the textarea and make as "
items('Apply_to_each')['content']['type']" then press add.
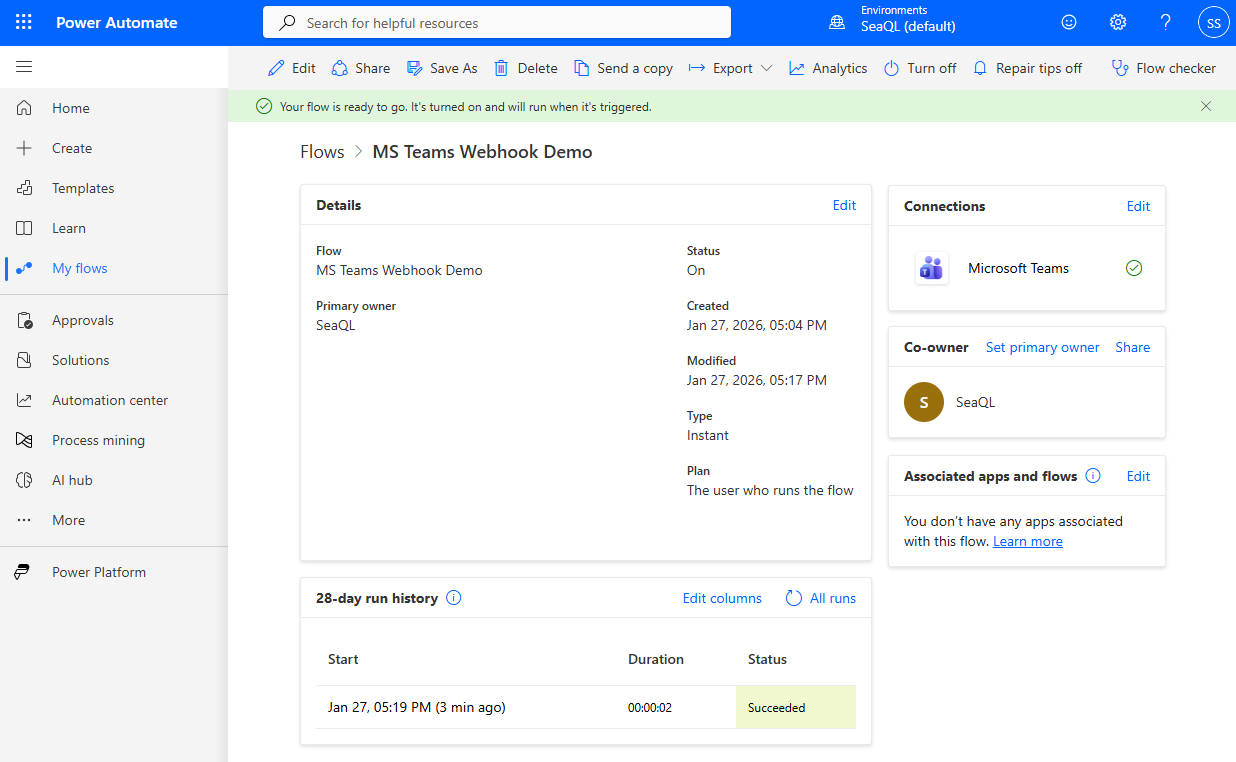
- Save the "Automated cloud flow".
- After saving, we can now copy the webhook URL for integration.
# The wehbook URL should look like:
https://defaultXXXXXXXXXXXXXXXXXXXXXXXXXXXXXX.XX.environment.api.powerplatform.com:443/powerautomate/automations/direct/workflows/XXXXXXXXXXXXXXXXXXXXXXXXXXXXXXXX/triggers/manual/paths/invoke?api-version=1&sp=%2Ftriggers%2Fmanual%2Frun&sv=1.0&sig=XXXXXXXXXXXXX-XXXXXXXXXXXXXXXXXXXXXXXXXXXXX
- You can view the execution log and status here.